

Hi.. this is my 8th card for Creative Escape Papercrafting using the Fall Frenzy Kit. OK if I am really honest with you... at this point my paper pieces from this kit are really running low. It was enough however to make the bottom base for the landscape. From there it's all stamping and copic colouring but I still think it turned our really cute. You just have to use your imagination and have fun.

Description
This kit is packed with hand-picked goodies to enable you to have a fall card making frenzy. It’s perfect for Thanksgiving cards but also has elements that you can use all year.
The kit contains:
1 “Forest Feast” Lawn Fawn stamp set featuring 14 images and 11 words/phrases (made in the USA)
1 “So Thankful for You” Lawn Fawn die, approx. 5.75″ long (made in the USA)
1 Echo Park “A Perfect Autumn” 12×12 Double Sided Paper 3″x4″ Journaling Cards (cut into 2 pieces for shipment) (made in the USA)
1 Echo Park “A Perfect Autumn” Seasonal Stripe, approx. 12″x1.75″ (made in the USA)
12 double-sided 6″x6″ sheets of Echo Park “A Perfect Autumn” paper (made in the USA)
1 sheet of 8.5″x11″ yellow card stock
2 sheets of 8.5″x11″ kraft card stock
3 sheets of 8.5″x11″ white card stock
1 sheet of 8.5″x5.5″ copper card stock
1 sheet of 8.5″x5.5″ water color paper
1 sheet of 8.5″x5.5″ alcohol marker paper
1 Fall Frenzy sequins mix (1.5 teaspoons of sequins)
3 assorted die cut pumpkins (various sizes)
10 assorted die cut leaves (various colors and shapes)
3ft of yellow and white cord
3ft of jute twine
3ft of natural hemp cord
1 bottle of Golden Sunset Nuvo Glitter Drops (1 fl oz)

So to start this card I pulled the great stamping paper from the kit, the ink, my misti stamping tool,.. the dies I had to make the pennant sentiment and the small pieces of brown paper that was left for the landscape pieces. The pieces stamped above will be coloured and hand cut out to place them on the page into the scene I will be creating.

In the above photo I have roughly decided where the landscape pieces will fit on the bottom and est this I then stamped the 2 critters onto the card base to fit into the background.

Now after colouring all the pieces with copic markers.... I put the pieces into place. The background still looked pretty empty and bland so I had drew the trees and then placed the pennant sentiment on top of the trees adding another layers. Now it looks complete and I am happy with it. To the tip today is to have a few elements stamped into the background, then add some paper, and more cut or die cut images out in front to give depth and dimension to your project. I doodled a line across the landscape to show the layers too.

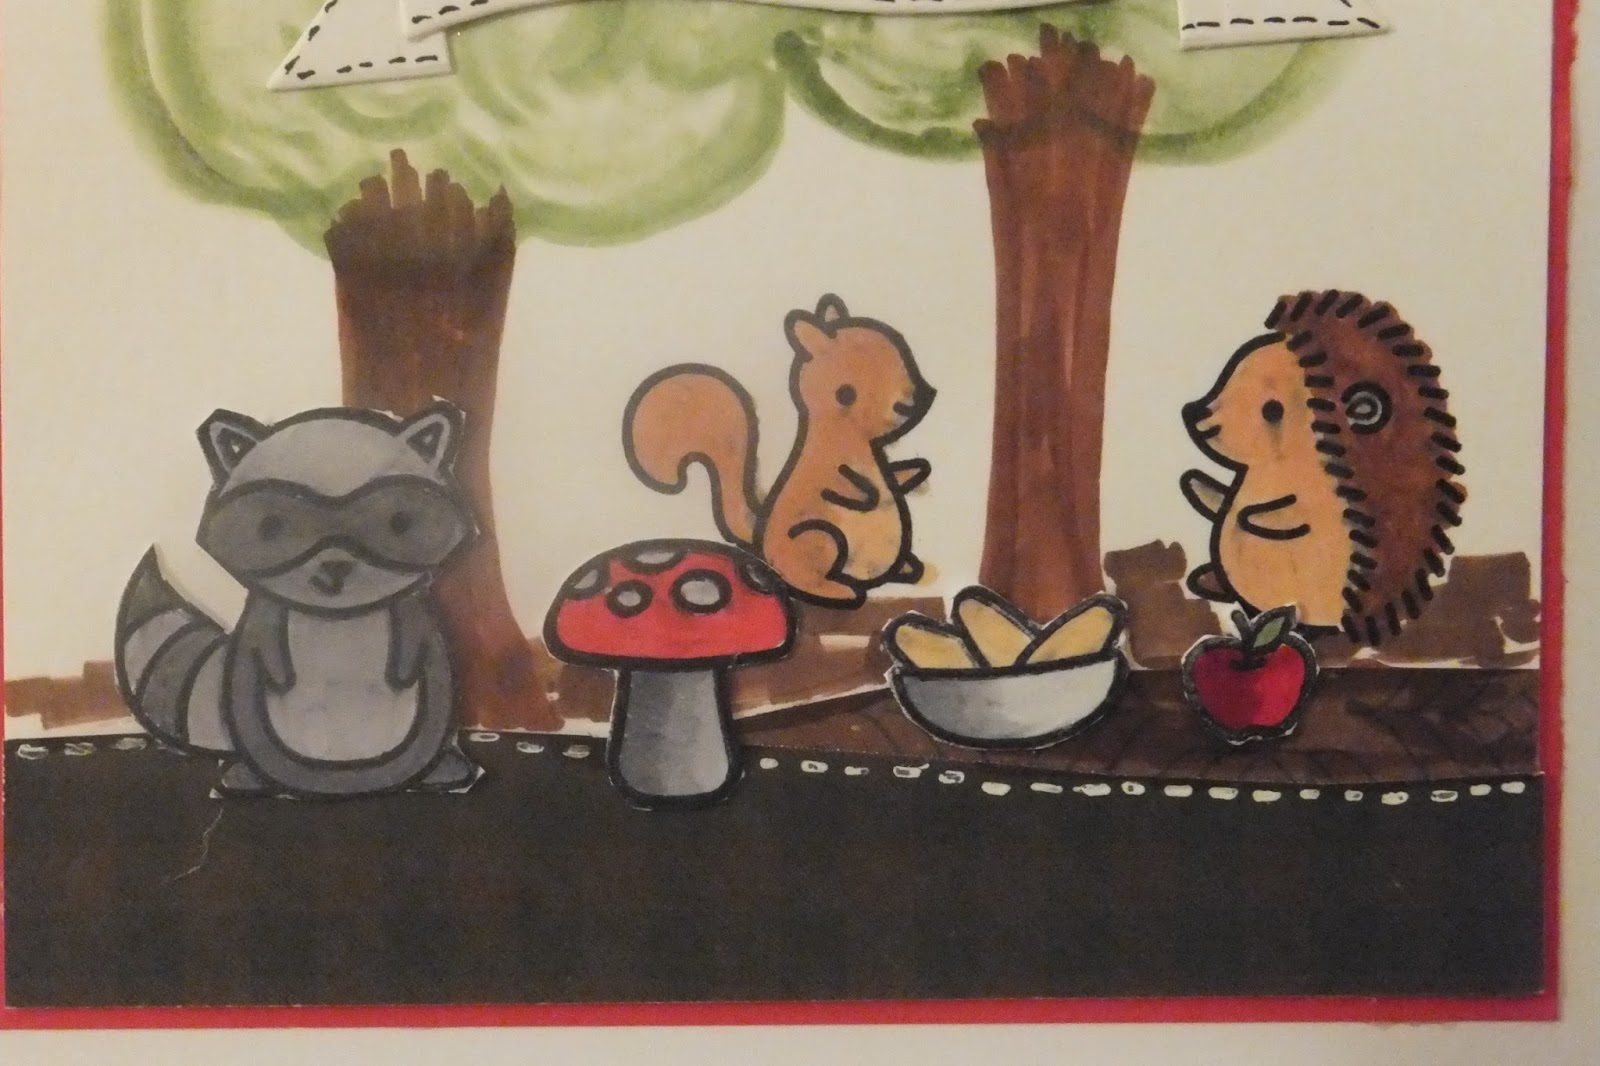

Up close you can see the added touches and the details... all little things that make your project just right. Thanks for stopping by.... see you again soon.

1 comment:
it's very cute and beautiful Bev
Gr Karin
Post a Comment