Tuesday, September 30, 2014

Off the Rails Scrapbooking monthly mood board


Hi everyone.. this is my first mood post at Off the Rails Scrapbooking
and I am super excited to share my page
that is inspired by the mood board below.. what amazing fun and bright colours.
I tried to pull these colours into the splatter background, the diagonal stripes
and the fun pennants below the photo.
I also had fun experimenting with Creative Embellishments chipboards using different treatments... some paint, stamping, embossing powder, cut files and additional burlap accent for
 even more depth and texture.


Be sure to join us this month and play along. We can't wait
to see you link your project so we can visit and leave comments.
Also play along for the monthly prize.

Photobucket

Sports and a great sketch

Hi.. so today I am using the sketch by Brenshevia below and also the Sunburst cut file
to create my fun sports page. I used the Echo Park Mini Themes soccer goal collection.


This Sunburst cut file was great to start the background.

Here are some close ups of this fun sports page.


Here is a close up of the sunburst section. I added some black pen outlines to the rays.
Also I added some stickers and also cut the #5.


In this section is some stitching on the straight band, added some more strips on right side,
and then some more stickers and the Soccer title cut from the paper.

Photobucket

Monday, September 29, 2014

Just Imagine Crafts/Kreaxions and Paper House multi tasked to create a fun card


Just Imagine Crafts celebrates today with their 1st DT Reveal with the newest Team.
Everyone has something amazing and inspirational to share using the Kreaxions Circle Cutter and so many different punches... each project so different and fabulous. Be sure to check them all out on the Just Imagine Crafts Blog.

My Card starts off with a circle cut using Keaxions Circle Cutter.. (the best ever that cuts to 10" on a very small surface.  The background is stamped and the tree trunk is free hand cut to fit.


In the close up you can see that I embossed both pieces to add more texture and depth to the tree.
After that you cut lots of circles using many different sizes and lots of coordinating colours or paper.
I used my Paper House products using 2 different but compatible combos for this project.
Also grab lots of fun colour coordinated buttons.
Glue everything down... doodle with black pen on a few circles.
For the bottom I Kreaxions punched a border using #301,
A stamped sentiment is layers and placed on a piece of 
Creative Embellishment accent and the card is finished.


Supply List:
Paper: Paper House Little Man PP -0811, 
Paper House Romance paper pix PP -0611
Stamps:
Embossing Folders:
Ink: stazon, Tim Holtz ranger
Punch: Kreaxions #301
Circle Cutter: Kreaxions
Paper Piecing: tree, circles
Pen: Staedtler
Accents: Creative Embellishments
Other: buttons


Photobucket

Friday, September 26, 2014

Off the Rails Scrapbooking - Recycling and Dryer Sheet Flowers


Hi  today at Off The Rails Scrapbooking I am sharing a post on  
Recycling and the environment.
So Scrappers get out those recycled items and make a layout.
On the layout below I used recycled Jellibean packaging, 
tattered black piece of (garbage) paper with distressing 
and the main piece for today's Tutorial is the RECYCLED DRYER SHEET FLOWERS.

Take those used recycled Dryer Sheets. Cut them into different sized circles,
 spray with glimmer mist and dry, then edge with stickles and dry.
Layer them and put a brad or accent through the centre.
What a fun, simple and fabulous Dryer Sheet Flower.
Because your colouring these yourself.. you can 
make them any colour to match your project papers.


Here is my sample page using 3 different coloured dryer sheet flowers. 

Thanks for stopping by.. and look forward to seeing you again soon.

Photobucket

Multi Tasking with the best products


This month Scrappin Madges Embellishment Kit for September had some
super fun accents that suited the paper and sketch perfectly. (below)
This fun page started with the base paper from Paper House called Love Birds P-0606


and shared this piece as my LGS week #5 selfie page.


In the close ups I will share the great sections to my page.
In this section the washi tape top border pulls more black into the page.
The double banner is cut from a 2nd sheet, inked and popped up on top of base paper.


The bird cage is double mounted also... and there are a few stitched circles over 
the span of the page... just a touch more of black.


Super fun chipboard title with fun stickers, and alpha to create a great cluster
with some more stitched circles.


Super cute small lower edge cluster.


Another fun small cluster to base the photo. 
More stitched circles over the page.

Up Next I have a card to share.


This card has lots of stickers, fun washi tape and stitching to finish it off.

Photobucket

Thursday, September 25, 2014

JnW Crafts and an Acrylic Glass Jar template


Hi.. back again with another new product from JnW Crafts.
It's the Glass Jar. 
On this card I started with the Paper House blossom paper pix and made sure there was 
room on the fun floral and butterfly paper to add the acrylic jar piece and still
add some fun rubon butterflies and flowers behind it. 
I added the matted and layered sentiment, inked the edges and it was done.


In this close up you can see the rubons behind the acrylic but then on top of it and 
posititioned on top of butterflies I added some gem stones. Adds depth and 
texture to my card.

Thanks for visiting today.. be sure to visit again.. I have some
fabulous ideas to share with you soon.

Photobucket

Monday, September 22, 2014

Just Imagine Crafts / Kreaxions using Robin's Nest paper and Paper House 3D stickers -Multi tasking 3 amazing products


HI..... super excited to share this easy but fun card
with super colour combo for my Just Imagine Crafts post for today.
and added base brown cardstock which I punched 
with Kreaxions  Punch # 920 and also used the throw away negative piece too.
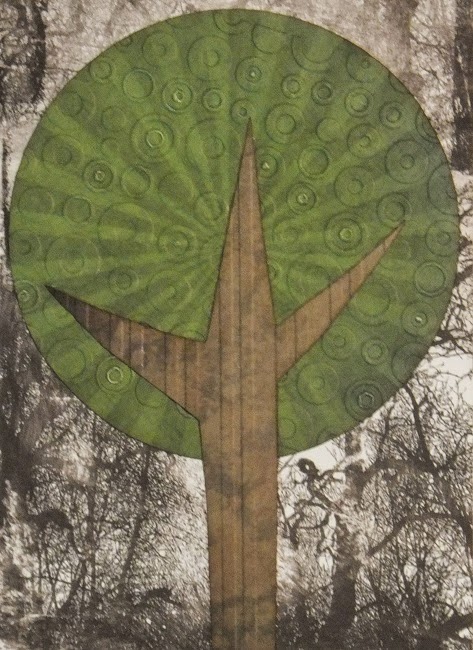
I mounted the vertical punched and negative piece along with the flip
side of the paper which was striped placed to the side to leave 
the fabulous florals still visible to the eye. 
I used a Scrap Much sketch from the Cancer Fund raising Crop.
The layers of circles are cut using Kreaxions Circle Cutter. 
It cut through paper and also the cork board for great textuer look
It is the best out ther and cuts to a 10" circle on very small cutting surface.
I ink stamped the sentiment and matted it. Using Signo white gel pen 
I added some stitch lines for even more depth. 


NEXT UP: 

This card started with a brown base for the background.
 The fabulous Leaf Glitter Cardstock is so full of fun colours 
 which is perfect to start this card.
I then grabbed the bright orange cardstock to punch the border using Kreaxions #920.
To give it the fall rustic touch I added a strip border of corkboard tied with twine.
The rubon stickers were put on white cardstock to pop them, fussy cut trimmed 
and mounted on the bottom of the card. Fabulous Thanksgiving card.

UP NEXT:


I always love sharing a layout of some kind and the super fun 
bright card above inspired this page.
I started with a brown cardstock base, added a verical centre piece using 
the Leaf Glitter Cardstock which I added stitching to the out edges.
Horizontal through the centre I put the reverse striped side of the paper.
Now using the fun bright orange and red cardstock I made some borders.
One is Kreaxions #920 punched and the other is Signo white gel pen stitched.
After positioning the photo I grabbed some Paper House 3D accents that fit the 
occasion perfectly... the turkey, title and journal strips.. but the upper left corner
needed something.. so grabbing a piece of burlap, fraying the edges and 
topping it with the 3D tree sticker was the finishing touch.

Thanks for visiting today.. come back again when I share even more projects.

Photobucket

Wednesday, September 17, 2014

Scrappin' Madges Birthday Celebration Blog Hop


Scrappin' Madges Birthday Celebration Blog Hop.

If you arrived here in error.. be sure to start at the beginning please: 
Start: Scrappin Madge: www.thescrappinlounge.com

You should have arrived here from Rhonda Helm: http://craftingwithblue.blogspot.com/
Bev Code: YOU ARE HERE
and up NEXT: Dawn Marie: http://kraftychick.blogspot.com


Prizes are the Yellow Fuji Polaroid camera for one lucky winner,
another lucky winner could win the amazing mini album by Rhonda Emery
and one more could win the Peachy Keen Stamp set from Linsey Rickett


This page above is the celebration on my only Grand Son's 1st birthday with family 
and friends who were there to share in his day. It also is his Grandpa's birthday too. 
The two of them have this fun thing going on. 
The GS says it's now his birthday as Papa has had it long enough 
while Papa says it's his first because he's had it longer.

I also used this month's sketch from Sketches in Thyme to create this page.


Supply List:
Paper: Paper House Jungle Friends P-0615, 
Paper House Little Animals Paper Pix PP-0613
Stickers: Paper House Born to be Wild STCX -0169
Accents: 3D birthday stickers Paper House STDM -0209
Cardstock: misc
Pen: Staedtler black
Other: twine, brads

and up NEXT: Dawn Marie: http://kraftychick.blogspot.com


Photobucket

Tuesday, September 16, 2014

Let's Get Sketch "Get Inspired" Magazine submissions are up for Issue #5


Lets Get Sketchy " Get Inspired " Magazine Issue #5 submissions are fast approaching.
The Challenge is to use the mood board and share for submission on the blog,
I created the page above using all the fun fall colours.


Liquid pearls on the title has texture look and also pops with gold sparkle.
The corrugated cardboard accent border is full of fun rippled texture.


This cute cluster has 3 tones of paint.. orange, brown and red.. all the fall colours.
Super fun leaves, an acorn 3D accent are Paper House Give Thanks 3D stickers
 and a wired title finish off the cluster.
The stamping on the circular accent shows up really clear in this close up photo.


This amazing fun circlular accent was stamped on with black ink.. 
to give more depth and textured look along with the gesso and stamping in the background.
Two more fun clustered sections  surround the super cute photo
 which is matted behind with burlap piece.

All the fun fall colours and the base paper collection from
Paper House Halloween Paper Pad make for a fabulous finished page.
I used the Dusty Attic September sketch for this page.


Photobucket

Monday, September 15, 2014

Paper House and fabulous Canvas Stickers


Hi I love this paper line.. Paper House Horse Collection.... 
I just don't have photos of my own to create with so
I have been using my friends photo with horses... 
and I really like the results and can't wait to share with them too.

This page started with a Scrapbook Generations Create Layout Sketch and it had 
super fun paper strips... but what better replacement for strips than washi tape... 
so that's where I started. I however had to be careful to keep the amazing right side with the 
great photos of the horse up front and centre... so i dropped the fun cluster of photos 
to the lower left corner. I also am using this as a submission for September Challenge 
at Creative Embellishments. After slanting the photos together I add a 
Creative Embellishment photo frame accent over the centre one. It was perfect.
Then getting the fun coordinating stckers out to base the photos was next... and off
to the lower right base I gathered some amazing canvas stickers and the cluster of them
looks awesome on this page.


Here is a fun corner cluster using papers, stickers and more Creative Embellishment panel accents.
The cute tags help shape the cluster.. and I added some star brads.


Here is the close up of the canvas cluster.


Here is the fabulous sticker accents all so perfect for the theme of the photos.

Supply List: 
Paper: Paper House Horse Lover P-0322
Stickers: Paper House STDM -0035
Canvas Stickers: Paper House STCA - 0002
Accents: Creative Embellishments
Pen: signo whte gel
Sketch: SG Create Layout sketch
Other: stitching, washi tape, brads

Photobucket