Showing posts with label Let's Get Sketchy. Show all posts

Saturday, November 23, 2019

Scrapbook Saturday at High Hopes Stamps

Today is Saturday Scrapbook at High Hopes Stamps
For this page I am sharing a fun winter page of my eldest Grand Daughters playing in the snow after a sleep over. It was always so much fun when the kids came to our house and spent time .... we had such great times together. The Nordic Snowman was a perfect accent on this layout all decked out for the cold weather in the amazing sweater and hat.. like the girls in their snowsuits and hats.
 For inspiration I used this Let's Get Sketchy sketch and hope that your now inspired to create using both a stamped image accent and maybe a sketch too. 


Supplies List:
  • Stamps: Nordic Snowman TLF 009
  •  Copics: YG93, C7, B0000, B000, B97, B93, B91, R24, E25, YR07, 
  •  Other: Paper, chipboard, signo white gel pen, stickers, ink, oval die cut,
  • Sketch: Let's Get Sketchy
I have been playing along with Lets Get Sketchy November Sketch challenge.  
Be sure to stop by the Facebook Page for some daily inspiration from the Design Team Divas.  You can also follow us on Instagram, Twitter and Pinterest.

Thanks for stopping by and have a fantastic day.

Hugs, 

Thursday, May 9, 2019

Let's Get Sketchy Challenge


For this page I am using Let's Get Sketchy Challenge sketch (below). It showcases my Grand Daughter with her fabulous new shorter hair cut. She looks stunning. I am using lots of my Echo Park Collections for creating lately.


Thanks for stopping by.... see you again soon.

Photobucket

Saturday, March 23, 2019

Soccer Happy Moments for One Crazy Stamper

Welcome OCS Fans;

Hi it's Bev here today again sharing layout page for my DT project for One Crazy Stampers using High Hopes Stamps. I also am thrilled to tell you that I will not be doing cards but scrapbook layout pages and some of the accents will be co-ordinating stamps for the themes of the projects. It should be great fun. This page showcases Jules playing soccer when she was little. I am sharing this at One Crazy Stamper  using High Hopes Stamp Soccer Star TT036.


To start this page I stamped the image and then copic coloured it using some of the colours from the photos to match thing up. I then highlights image with signo white gel pen.


For this page I am using the Let's Get Sketchy sketch so I worked on the base background following the sketch below.


From there I laid out the proposed positioning of the photos and the image and also placed some accent pieces where I hoped they would suit.


I did some stamping in the areas around the photos - above and below.


In the close ups you gat a better view of the details.


Chippies and flower cluster.


Central section with lots of accents but the photos and stamped image are still front and centre.

Supplies used:
  • Stamp: Soccer Star TT036
  • Copic Markers: 0. C0, C01, C03, C5, C8, B000, B12, B14, B16, E00, E01, E55, E57, E59, W5, W7 
  • Paper: 49 and Market Captured Adventures
  • Accents: 49 and Market Laser Cut Shapes Happy Moments, Botanical Pot pourri Marina Flowers and Stamp.
  • Other: signo white gel pen, cardstock, Ink Roller, 
  • Sketch: Let's Get Sketchy
Be sure to stop by the One Crazy Stamper blog and Facebook Page for some daily inspiration from the Design Team Divas.  You can also follow us on Instagram, Twitter and Pinterest.
Thanks for stopping by and have a fantastic day.
Hugs, 


Saturday, February 23, 2019

Layouts with Stamped Images from One Crazy Stamper

Welcome OCS Fans;

Hi it's Bev here today and I am sharing my 2nd  DT project for One Crazy Stampers using High Hopes Stamps. Again it is a scrapbook layout page with a stamped and coloured image which is being uesd as an accents that co-ordinates the themes of the project. This page has photos from our time in Florida whan we visited the McKee Gardens where all the natural vegetation is amazing and depending on the time of year has many blooming and amazing plants. 


To start my project I stamped the image ....Country Garden and picked colours that would compliment the papers I planned on using. 


Copic are my favourite medium to colour with.... but lots of pencil sets out there now too. I love the shading options that come with copic markers.


Next I layouted out the proprosed background and postioning of the fabulous stamped and coloured image... and glued everything down ready for the photos.  I am using a Let's Get Sketchy challenge and here is the sketch used. 


Next was the photos and some fun accents from the paper collection and the flowers.

 Supplies used:
  • Stamps: Country Garden T005
  • Copic Markers: 0. B000, R20, R21,  R22, Y13, Y15, E55, E57, E59, G12, G21, G24     
  • Paper: Graphic 45 Garden Goddess
  • Flowers: Prima
  • Chipboard: Creative Embellishments, 
  • Other: Cardstock, Ann Butler Iridescents medium, signo white gel pen
Be sure to stop by the One Crazy Stamper blog and Facebook Page for some daily inspiration from the Design Team Divas.  You can also follow us on Instagram, Twitter and Pinterest.
Thanks for stopping by and have a fantastic day.
Hugs, 


Sunday, January 13, 2019

Echo Park and Let's Get Sketchy


For this page I am using the Let's Get Sketch sketch below.  This page is my only Grand Son and his girl friend enjoying summer fun together. The paper collection is Echo Park Yours Truly.

I enjoyed sharing with you today.... and thanks for stopping by.


Photobucket

Sunday, November 18, 2018

Halloween page for Let's Get Sketchy and Creative Inspiration


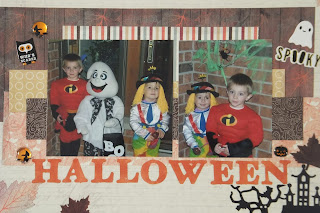
Hi I had fun creating today using the Let's Get Sketchy sketch challenge (below) and a Creative Inspiration Nov. Mini Crop challenge to make a Halloween page. This is photos of my 2 youngest Gkids when they were so little.


In the close ups you can view the details of the page better.

Die cut spooky house, copic coloured letters and Paper House stickers.


Lots of amazing paper layers with great colours to mix and match.

And 2 really cute photos of my Gkids.
Thanks for stopping by..... always happy to see you here.


Monday, September 10, 2018

Christmas -family is forever


For The Rubber Buggy project this month I am using the Let's Get Sketchy challenge sketch below as a starter point. This is my my Grand Kids enjoying the 1st Christmas at the new house..... we celebrate together.
I am using Authentique Alpine Collection of papers and for all my pages I use Tim Holtz distress ink on the edges of the papers for depth and demesion. I also use my favourite Beacon 3-in-1 glue. 
I then added lots of my stast accents... with lots from Paper House. I added stitching and some brads too.


In the close ups you can see lots of layers, some stitching and super fun clusters of accents. Some stickers, some rubons and even some washi tape.

The matted photo is foam popped up.

The many layers are perfect with the photos that still pop off the page.


Be sure to visit the STORE for these and so many other products... all amazing..... and so many that are not available at all your local store. ... and fabulous service.

Thanks for stopping by... love to see yho visit.


Saturday, June 30, 2018

Let's Get Sketchy Challenge


Using the Let's Get Sketchy sketch below I created this fab groupFamily photo page with fun colours with a pop of gold. Lots of layers, some great chipboard accents and photo is foam popped up with a black matting.


Thanks for stopping by. Enjoy your weekend.

Photobucket

Monday, June 25, 2018

Celebrate - Graduation page


The ScrapRoom Taste of Color Challenge as per below along with the Let's Get Sketchy June 1st sketch both of which I used for the page. I am sharing my page created using the colours listed, the sketch along with some great photos from my youngest Grand Daughter Julia's Graduation with her gramma Baba and Great Gramma B. Love pages full of memories with people in our families.
For this page I used products from The Rubber Buggy - Blue Fern Studios paper. Creative Embellisments chipboards painted and ink and covered using Nuvo glimmer paste, along with an inked stenciled star burst along with a flair button. I added misc brads and pearls 


As you can see I start by cutting and layering all the background pieces and I painted the chippie frame white.


Other chippie pieces were painted white then coloured and finished with Nuvo glitter paste for sparkle.


You see the great flair button and pearls in this photo too.


Lots of layers, chipboards and fun flair button and pearls accents this page.


 Thanks for stopping by ... have a great day.

Photobucket