


So here is week #1 with detailed instructions to make the PERPETUAL CALENDAR. The most important things to remember is to visualize the whole calendar colour scheme you would like when picking all the elements. Whether you go with a monochromatic, soft muted, bright and fun colours.. you need a frame, cover, #'s and month holders. There will be Monthly Cards too but you will get info on them later.
**************
So now we will work on part 2 of the Perpetual Calendar... the main frame / stand. I will share two ideas on how to make it because finding a large one piece of heavy card board might be a challenge so I have an alternative to this.


Here is the finished base frame to the Perpetual Calendar. I painted the edges to finish it off. Be sure to stick with it here for the next step to this fun project.
**************
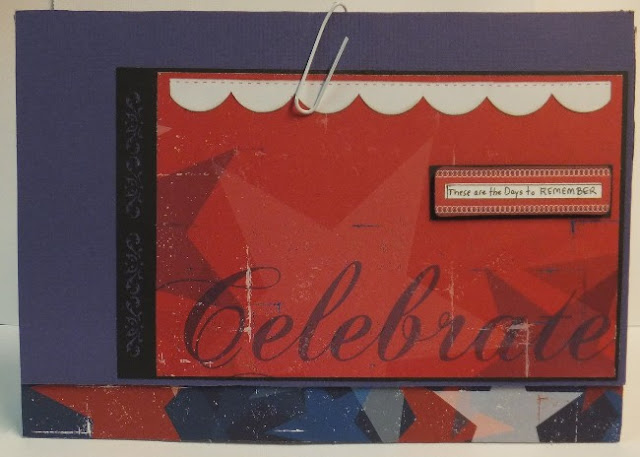
hi.. so are you ready for the next step... the MONTHLY CALENDAR CARDS. They will go inside the Monthly Holders that we made.
These Monthly Calendar Cards being made separate would make it so easy to replace some or all of them as you add more celebrations and want to delete some .... the base would be the same just adjust the calendar.. isn't that a cool idea.
I started with a hand drawn detail sheet and added the photos of the original sample and then added photos as I made mine.
Lots of variations to see and use for ideas.


**************
hi, back again with some finishing touches.
You have already done, the frame, front cover, 2 sets of #'s, monthly holder and the monthly cards.
Here is the monthly holders with cards in them finished and decorated.


so 12 months are ready and together. It is suggested that you staple closed very close to the left edge so the card doesn't fall out and leave the right side open to pull out the card and write on it. Here is the photo of the finished project in piles ready to take to be bound together either at a LSS or Staples.

And while I was putting this together I also made another frame using the alternative method with the single pieces of poster paper and reinforced with cardboard to test the stability...
and it worked out just fine.
I am hoping you can see what i was trying to show you .... the inside was doubled at the flexible seams to reinforce it.

I sure hope you have enjoyed this perpetual calendar tutorial.. and will find time to make them for yourself or as gifts any time of year... thanks for viewing.
ps.. I tested a page and you can print them to save for your quick reference
when your ready to make yours.
Any one that makes one.. please comment below and leave a link your project
so I can visit and view it.
Here is the monthly holders with cards in them finished and decorated.


so 12 months are ready and together. It is suggested that you staple closed very close to the left edge so the card doesn't fall out and leave the right side open to pull out the card and write on it. Here is the photo of the finished project in piles ready to take to be bound together either at a LSS or Staples.

**************
And while I was putting this together I also made another frame using the alternative method with the single pieces of poster paper and reinforced with cardboard to test the stability...
and it worked out just fine.

I am hoping you can see what i was trying to show you .... the inside was doubled at the flexible seams to reinforce it.

I sure hope you have enjoyed this perpetual calendar tutorial.. and will find time to make them for yourself or as gifts any time of year... thanks for viewing.
ps.. I tested a page and you can print them to save for your quick reference
when your ready to make yours.
Any one that makes one.. please comment below and leave a link your project
so I can visit and view it.

3 comments:
Wow, those calendar pages are gorgeous! Thanks so much for sharing this. Fabulous job!
This is marvelous, Bev!! Looks like a lot of work, but well worth it. Someday I'd like to make one of these. Awesome tutorial, as always!!
Thanks for the tutorial! That's a really neat idea and you've done yours so beautifully!
Post a Comment