Showing posts with label Layout. Show all posts

Sunday, June 1, 2025

Stamperia Blue Land Projects for Embellish Away


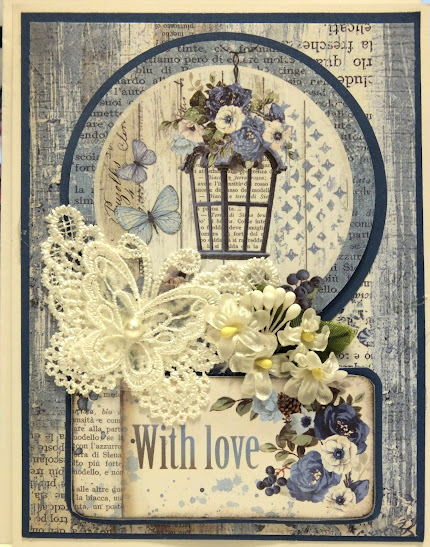
Hi ..it's Bev here to share with you. So how are you today. This DT project for EmbellishAway
 showcases the Stamperia Blue Land Collection.

Supply List:
Accents: 3D foam
Other: Cardstock, base card/envelopes, lace butterfly, flowers.


In these close ups you can view some of the fine details. Amazing cardstock matted layers, pop up levels for 3D dimension and stunning lace butterfly and flowers.


I made these 2 more cards using the same collection. There is so many options with the amazing print papers with stunning images on it. The one above I used white pen to ink fake stitching.


This card is very plain however it is circular in shape, popped up layers and lots of machine stitching on this card.


I also make a double page layout using this fabulous collection with amazing blue/ grey colours. It was perfect with the birthday pool party photos along with super fun and bright sticker accents. 


Thanks for stopping by... hope to see you again soon.... but in the mean time be sure to stop by the store ... so many others are available. Also take note of all the products that aren't carried in our regular local stores. ... AND the service is A1

Tuesday, April 1, 2025

Special Guest DT for April using Paper Rose Studio Rustic Spring Collection


Here’s a clever way to share multiple photos within a single scrapbook layout. I used the amazing Paper Rose Rustic Spring collection! I wanted to highlight the beautiful full sheet designs in this collection, so I constructed a clever split cover with a hidden waterfall of photo mats. Captions and embossed die cut elements add the final touches to this beautiful page!

💛

Featured products:
Rustic Spring 12 x 12 Paper Collection 34230
Watercolour Basics 6 x 6 Collection 20474
Rustic Spring Embossed Die Cuts 34281


And special Printable Instruction sheet to make your very own layout page using this super easy and fun technique... especially when you have amazing paper collections with fabulous and beautiful images you don't want to cover up.


yours in crafting with


Saturday, November 26, 2016

C89 Sweet Baby Collection layout for Fab Scraps

C89 Sweet Baby Collection Layout by Bev Code


I used C89 Sweet Baby Collection from Fab Scraps to create this super cute but easy card. The collection has a great mix of blues or pinks for both boy and girl projects. Be sure to visit the Blog where you can view lots of amazing projects using Fab Scraps Collections.

FOR THIS CARD YOU WILL NEED:
Supply List:
Collection: C89 Sweet Baby paper, chipboard and accents
Other: copic markers, lace, beads, buttons, punchinella, Tim Holtz ink

INSTRUCTIONS:
STEP #1:  For my background I used 2 part pieces of a full page and put them together on a 12x12 white cardstock.. I love the upper girlie print with the chevron bottom. I also added the strip borders of hearts too on top and bottom.

STEP #2: The upper edge got beads and the lower edge got lace... both suited to little girls.

STEP #3: Through the centre (or on either side of middle) I added pink punchinella accent.


STEP #4: In the close ups you can see the details of the other accents and placement. This section has a fun cluster of pieces. The cute sweet baby girl with a matted fussy cut background mat and inked for depth. The chipboard is copic coloured and I added the small heart button.


STEP #5: In this section you can see the other chipboard accent which also is copic coloured. Above shows the super fun sticker which was put on white cardstock to make it pop and hand cut. See the fun punchinella out to left side of photo.. and the cute heart button accent.


This photo is through the main central section showing all the accent pieces and placement. Remember when crafting.. following or scraplifting is fine and fun.. but don't forget .. make it your own and have fun.


Thanks for joining me today. 

Friday, October 7, 2016

C90 Christmas Collection Layout page for Fab Scraps


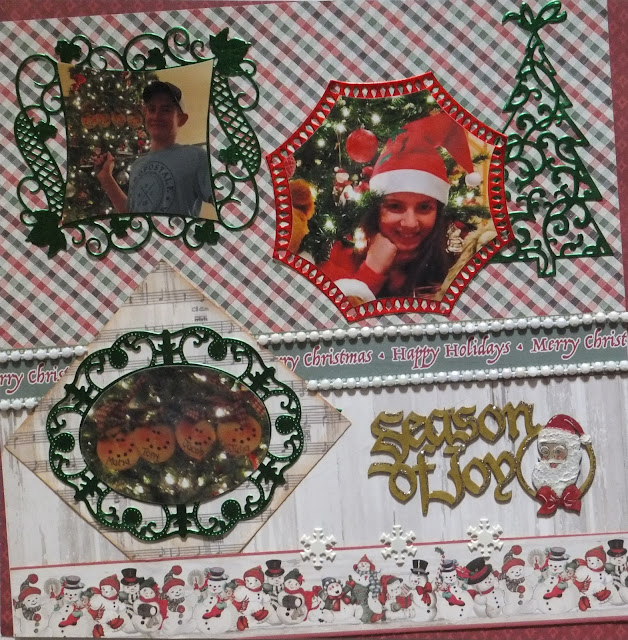
Hi.. I love Christmas and all that goes with it. Snow, decoations, gifts and mostly family. I used C90 Christmas Collection from Fab Scraps to create this layout using lots of spellbinder frames to showcase my photos. The collection has a great mix of colours and fabulous xmas prints with santa and snowmen too.  Be sure to visit the Blog where you can view lots of amazing projects using Fab Scraps Collections.

FOR THIS LAYOUT YOU WILL NEED:
Supply List:
Collection: C90 Christmas Collection, paper, chipboards and accents
Other: Spellbinder dies, metal snowflakes, cardstock, glitter paper, copic markers, beads, ink, stickles, signo white gel pen

INSTRUCTIONS:
STEP #1:  When starting this page I chose to use 2 different prints in the background. Cut the sections and needed and glue them together over  a white cardstock to start. I then tilted it and put it on the darker red background.


STEP #2: The photos are going to be frames using spellbinders... to make it easy you can cut the photos with the die and then cut off outer edge to make it fit the die.


STEP #3: On this close up you view the accent strips of paper placed in the centre with bead accents and the lower strip with some metal snowflake accents.


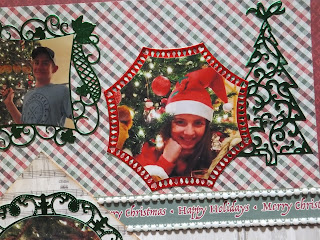
STEP #4: In the next couple of closeups we are viewing the finished spellbinder framed photos ... along with the xmas tree die too.


STEP #5: Each of the frames was die cut using fabulous fun glitter paper that shines... perfect for xmas projects.


STEP #6: The chipboard is coloured with primarily copics but used some white paint and modeling paste for the beard and hair for texture. I accented this chipboard with some stickles and also white signo gel pen accents.


Thanks for joining me today. 

Friday, August 12, 2016

"Dreamer" Layout C85 Shabby Rose Collection from Fabs Scraps


Today I share this Fab Scraps DT project done using C85 Shabby Rose Collection. This page is memory of my Grand Daughter getting her braces off after many months wearing them. What a beautiful smile. 

FOR THIS LAYOUT YOU WILL NEED:

Supply List:
Paper: C85 Shabby Rose Collection
Stencil: DS 05 50 shabby rose clock stencil
Chipboard: DC 85 002 chipboard Dreamer
Accents: metal, dew drop
Ink: Tim Holtz mini pad
Other: Spellbinder die cut, beads cardstock, sew easy ink roller, Kreaxions Circle Cutter, Heartfelt Creations flower shaper kit, copic marker


INSTRUCTIONS:

STEP #1: Pull your paper choices....  cut some shapes/ layers and you plan to use them. I chose some circles... one solid and one ring with the full sheet background for starters.


STEP #2: I decided that I'd layer the circles per above.


STEP #3: Next I thought it would be great to add more colour, depth and texturing to the page by stenciling the circles.


STEP #4: I added even more stenciling and also added ink to the edges of the circles to pop each layer.


Here is the close up of this section.


STEP #5: I chose this photo which needed matting top showcase the photo and I pulled the chipboard Dreamer title.


STEP #6: I copic coloured the chipboard and to make the  title pop I added paper backing.


STEP #7: I die cut flower pieces using Heartfelt Creations dies... but you can punch them also. I then shaped them using the Heartfelt Creations shaping kit.


STEP #8: Next you pick some accents... above is some chose to pick from. 


STEP #9: I went with the layered flowers with a dew drop centre and twine tied the metal accent to the flower cluster. I added some pearl border to the layout.


STEP #10: Here is the finished section with the double matted photo, stenciling and the clustered section.


STEP #11: I also added a 2nd cluster of flowers with a die cut flourish accent. Also I cut the grey print to create a paper border  and darkened the mat to make it pop.


STEP #12: In this view you can see how the layers, colour changes and stenciling gives added depth to the piece.

Thanks for joining me today.