Showing posts with label C87 Journey in Time. Show all posts

Sunday, November 13, 2016

C87 Journey in Time Collection Photo Slider for Fab Scraps


Hi.. I am super excited today to share my Fab Scraps blog post with you using C87 Journey in Time Collection. It's an altered simple and easy project. Be sure to visit the store for this collection and the many others available. They are all amazing with fabulous mix of papers, stencils and accents. 

FOR THIS PHOTO SLIDER YOU WILL NEED:
Supply List:
Other: copic markers, Ink, washi tap

INSTRUCTIONS:
STEP #1:  For this project I started with Paper Motions slide kit.


These photos below show how it moved and had motion by pulling the tab.


The backside is plain ready for decorating.


The front side has small card size pages slip when you pull the tab.


STEP #2: Above is the back decorated with travel paper and then I added copic coloured chipboard, stenciling done with mini ink pads and some paper accents and border paper. 


Close up view to see the details.


STEP #3: The front side is decorated with travel paper, some washi tape corners, some tickets and sticker "travel" title.


STEP #4: Above you can see that the colours of the flip card pages look great plain with the outer trimmed front and back. When I have a special trip with photos I will add them to the small slider mini album.


Thanks for joining me today. 


Friday, October 7, 2016

C87 Journey in Time Collection Bon Voyage Tag for Fab Scraps


Hi everyone.. for my Fab Scraps project today I am making a bon voyage tag using C87 Journey in Time Collection. After tags are done they make great accents to and travel mini album or even a layout page accent.  It could also be a tag on a travel gift to friends who you are spending time with... lot of fun ideas.

FOR THIS TAG YOU WILL NEED:
Supply List:
Other: metal accent, twine, ink, Memory Box die, ribbons

INSTRUCTIONS:
STEPS #1: Pull the papers, accents and the chipboard. Cut the tag base shape.


STEP #2:  Start by colouring your chipboard. I use copic markers on mine. Cut layers and pieces to fit the tag size. I put a background under the chipboard for more colour.


STEP #3: I added some stenciling to the background piece... but then decided to add yet another darker mat to background.. so double shaped background.  Using a few of the shaped accents.. the luggage tag and the airplane along with the metal accent.... lay things onto the base and decide on placement.

STEP #4: Notice the corner die cut circles on the purple checked paper... adds more texture and depth. Matted it with darker plain paper so the colours would pop.


STEP #5: Assemble the pieces in layers. 


STEP #6: Just remember you can add a little or a lot... your choice .. just remember have fun when creating. Lastly tie off the top with ribbons.


Here are the 2 close up views to show the details.


Thanks for joining me today. 


Friday, September 30, 2016

C87 Journey in Time Collection Happy Snaps for Fab Scraps


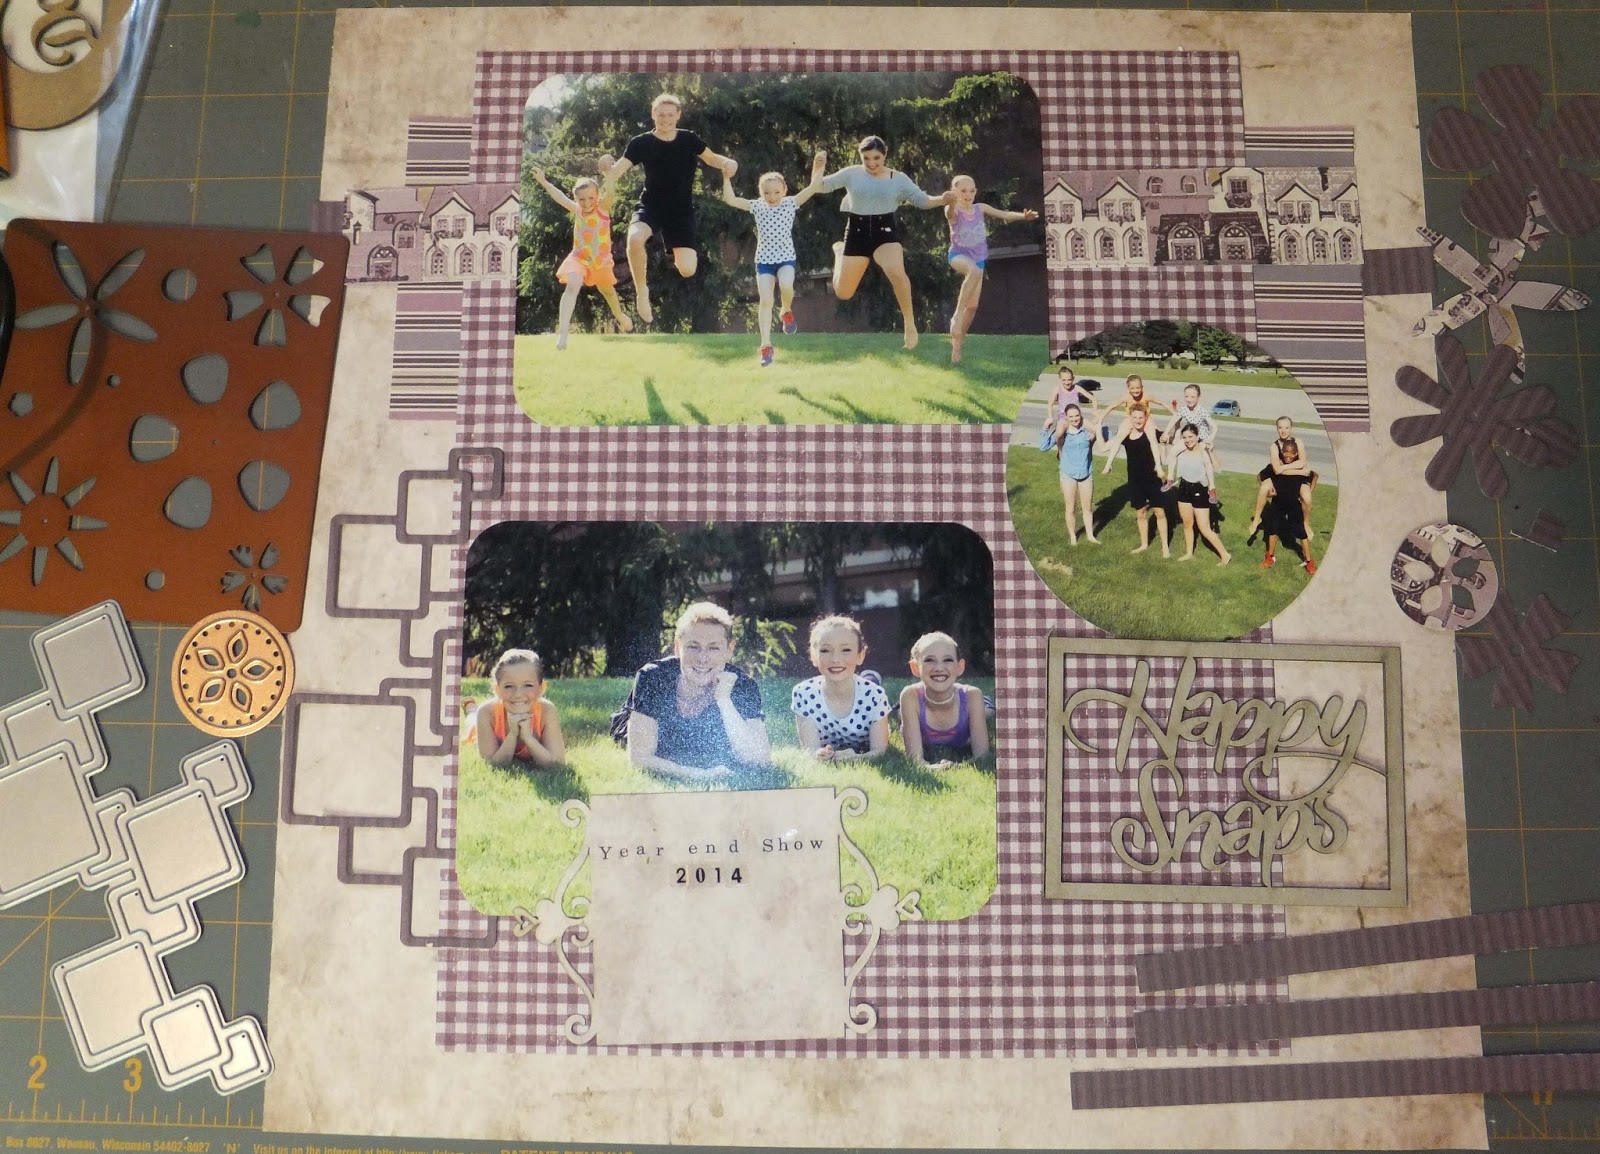
Hi everyone.... hope your all doing fine. Today I am sharing a Year end Show page for my friends daughters dance group. I enjoy putting her albums together every year as my Grand Daughters are not into dance for years now. Totally love the change to use fun colours to match the uniforms and a change up of accents too.

FOR THIS LAYOUT YOU WILL NEED:
Supply List:
Fab Scraps Products:
Paper: C87 Journey in Time Collection
Chipboard: DC87 003 Happy Snapo
Die Cuts: MC87 001 
Stencil: DS 054 Postage Stamps and numbers
Sticker: ST87 001 Postage Stamp
Ink: Tim Holtz mini
Die: Spellbinder, Memory Box
Accents: Stickles
Sketch: Oct Creative Inspiration
Other: brad, micron black pen, alpha, ribbon

I also used a sketch from Creative Inspiration.


INSTRUCTIONS:
STEP #1: First thing I do is pull papers that mix and match, cut some into different sizes or shapes for layers ( this one I followed the sketch above for a start to the background and turned it sideways). I lay the photos on, pick and or make some accents that will work with the the photos.


STEP #2: Take a photo of the above for viewing if needed. Now take all the extras off and start inking edges and gluing down the background.

STEP #3: Now add the photos one of which I matted for extra colour and also cut it into a circle for a change of shapes. I then used the stencil and traced the circular lines with black pen. On the upper right corner you and see some add brad accents.

STEP #4: shows a closer look at the circle photo and the lines around it.

STEP #5: In this photo you see the amazing chipboard title which I copic coloured and then added stickles to make it shine.

STEP #6: This section highlights the floral cluster using punched flowers and a background punched doily. Beside it is die cut accent that I added a date and show title with an added accent.

STEP #7: This is just a closer view of the fabulous fun accents you can punch, cut and use from the collection.


Thanks for joining me today.