Showing posts with label Just Imagine Crafts. Show all posts

Sunday, January 17, 2016

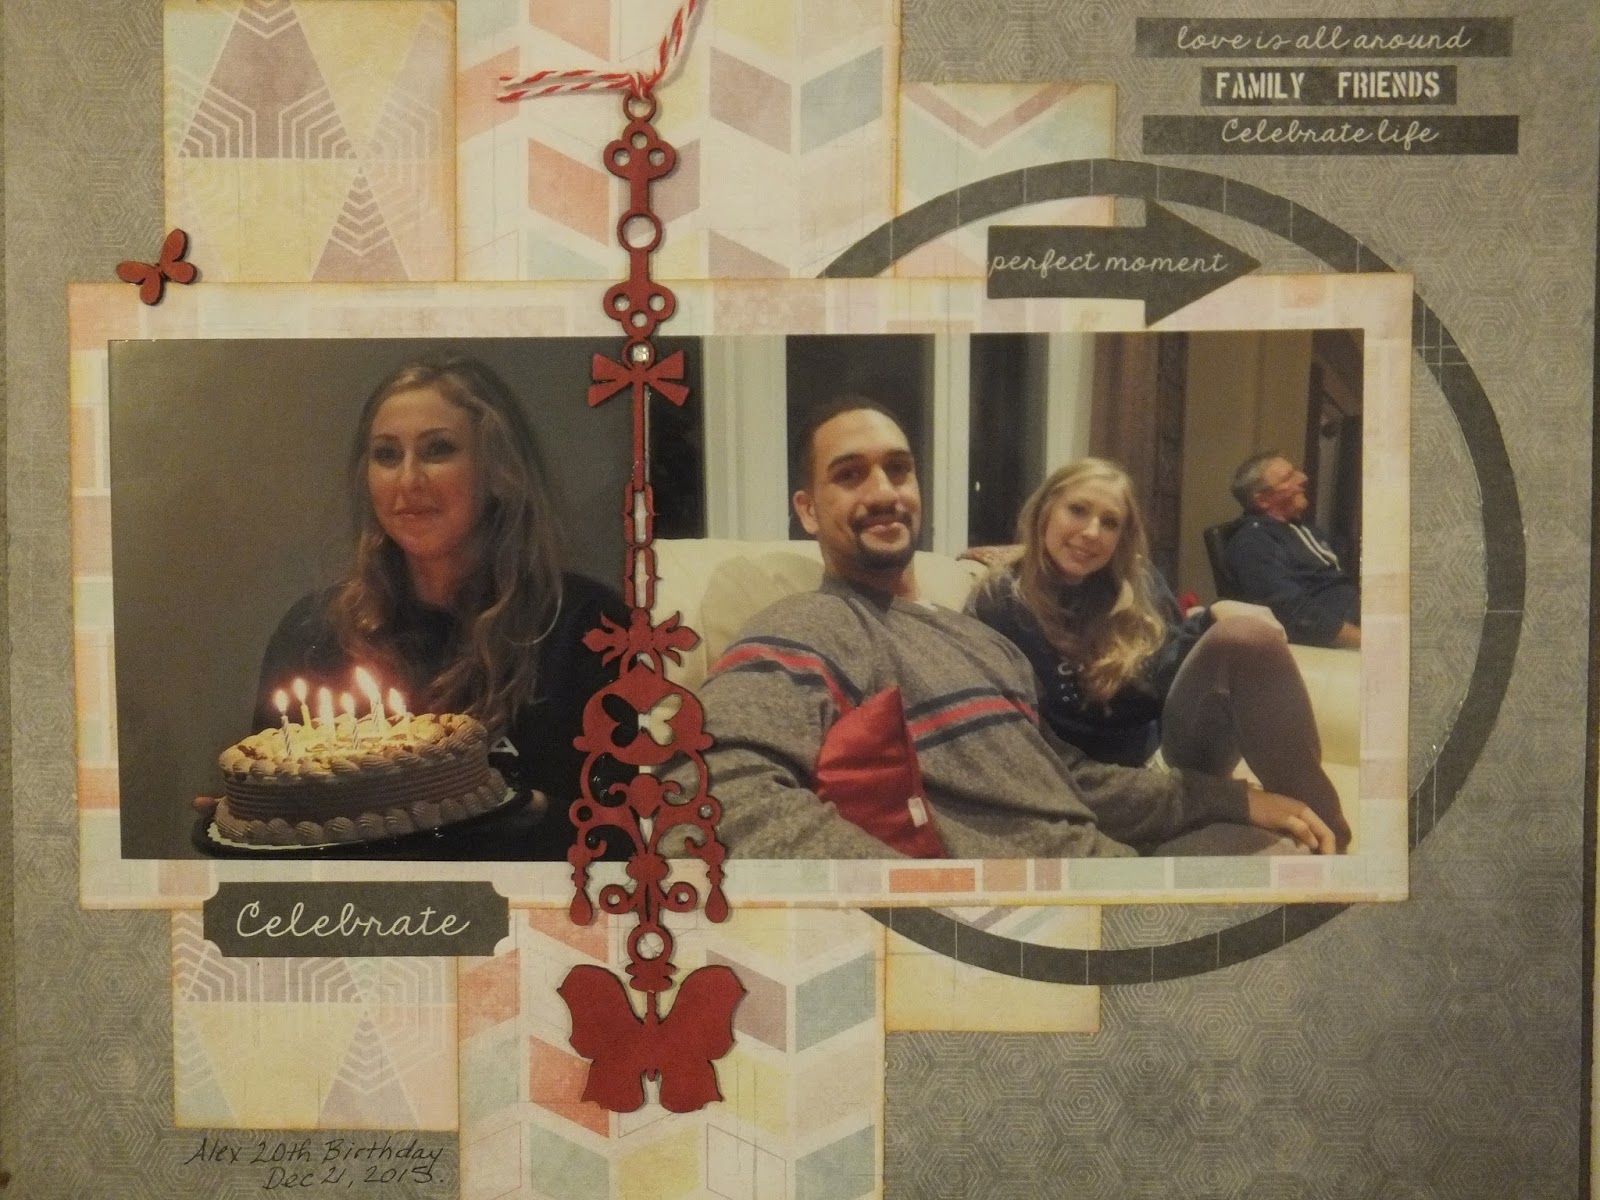
Celebrate


Using the Scrap our Stash (below- using Arrow Butterfly Chipboard sketch ) I created the page above. I used my products from The Rubber Buggy - 7 Dots Studio -illumination Collection and some Blue Fern Studios Flutter page Dangles chipboard.


In the close ups I'll share some details of my page. Special attention to the lower right corner with the paper strip with some cute stickers... and doodled signo white gel stitch line.


Here we see many layers of paper, a doodled upper corner, an arrow sticker and a ring circle cut using Kreaxions circle cutter from Just Imagine Crafts.


The Blue Fern Studio chippie is coloured with copic marker and tied off with Bella Creations Timeless twine.


Here is the central details photo that shows all elements welding together to create a great page.
Thanks for stopping by.. hope to see you again soon.

Photobucket

Saturday, May 16, 2015

Pretty girls all dressed up - multi tasking at it's best


Hi.. it's time to share another creation using Robin's Nest newest Rose Euphoria Collection
 and the cute Scrapbook Stamp Society image #791 by Sherri Baldy and I have been using
lots of Let's Get Sketchy sketches.


This paper, the image and the perfect photo makes for a great combination.


Fabulous paper ...  and


the cutest image. Isn't she adorable.


This close up lets you view the clustered section all cut from the paper collection.
Flowers, strips, leaves, and punched flowers ... then some added rubons to finish it off.

Supply List:
Accents: Robin's Nest Rosy Mini Die cut Shapes
Dew Drops: Robin's Nest dew drops
Ink: Tim Holtz ranger
Circle Cutter: Kreaxions
Sketch: Let's Get Sketchy
Markers: Copics
Others: misc rubons

I love multi tasking and using fabulous products along with great accents and
 even that perfect digital image that helps complete a page.
Thanks for stopping by.. sure hope to see you again soon.

Photobucket

Monday, May 11, 2015

Masculine Birthday Card over at The Rubber Buggy


Hi.. At The Rubber Buggy today I am super excited to share this fun easel card that I made for
 my Grand son's birthday this month.
Everything about it is masculine and very cool blue monochromatic touch
 with the pop of red twine and birthday matting with sparkle to it.

Supply List:
Cardstock: misc, card base
Twine: Bella Creationz Timeless twine
Punch: Kreaxions #919
Stamp: Dylusion Ranger
Sentiment: P-touch 

To make the Easel Card base please follow the photo and instructions below.


On this slightly different photo angle you can view the details of the stamped verse. It was perfect for any young boy who is growing up into a young man with every birthday.


Thanks for stopping by today.. be sure to visit daily when all DT hope to inspire you to create.


Monday, May 4, 2015

The Rubber Buggy - fabulous new design team - and my first blog post


Hi .. OMG I am so excited to be on The Rubber Buggy Design Team and this is my first post to share with you. My name is Bev and I hope you 'll come back regularly to see all the amazing fun products I get to share and create with and share with you every week. Look for some fun tutorials along the way too.

Supply List:
Paper: Maja Design - Nyhavn - Heritage Harbour
Embossing Folder: Deisire Embossalicious Make a Wish
Accents: Blue Fern Studios -Tattered Diamond Bits, Unique Doilies

Other Products:
Stencil: Prima
Ink: Tim Holtz Distress Ink
Punches: Kreaxions #309, #915
Rub Ons: Scenic Route My Girl
Twine: Bella Creationz Timeless Twine
Other Trims: Creating with Details, Metal key, flowers, beads


Today I'd like to share some easy ways to add texture and depth to your pages.


This close up shows a punched border .. but then add a mat with great colour to pop through for layers and depth. Ink the edges for even more depth and shadowing.


This section shows a piece of paper that I embossed then inked to give both texture, depth but a great vintage look too.


 This close up shows more texture and depth by adding layers.using some stencils and inking them. Also note the mat behind the rubon title with even more inking on the edges. Slip a doily way back  behind with all the great design and texturing too.


Not only did we texture and ink the paper in this section we added a punched border for more design, depth and texure. Both the upper and lower slanted borders adds more dementions to the page also especially with the matting and colour.


There is nothing more elegant than a beautiful cluster of flowers and accents.  All 3d looking with chipboard coloured using copic markers, a metal key tied up with timeless twine, flowers and even beaded floral. Now add a multi layers beaded border to base the photo.


Now for the fun part. Making your very own varigated butterfly accent using matching paper from the layout. It  is so easy to co-ordinate to your projects of all kinds... and butterflies are perfect accent for so many themes and creative projects.


Here is the printable sheet of instructions to be printed on 8.5x 11" paper.


After watching the short easy You tube tutorial .. you will be able to make the varigated butterfly to add to any of your projects using products your already have in your stash that co-ordinate with your project.


Here is the close up of the accented section with the butterfly and I also added a timeless twine flight trail. What a great clustered section to add to any project.
I really enjoyed this today and hope to see you again soon.

Thank you for visiting

Friday, May 1, 2015

Feeling Sketchy #120 and the cute couple


Hi.. Feeling Sketchy is up today sharing this fabulous sketch and this is also Polka Doodles digi image day. Both together make a wonderful combination to create a card.


Start by embossing the background and inking the edges and lightly on top of grooves.


Following the sketch add the doily.


Following the sketch put together the layers.. add the cute digi image which is framed using Sizzix cuts. Ink edges for layers, depth and texture. Sentiment border stickers are from SRM.

 A close up view of the super cute wedding couple.

Supply List:
Sketch: Debbie de Wilde Let's Scrap
Digital Image: Polka Doodles
Markers: copic
Circle Cutter: Kreaxions
Embossing Folder: The Rubber Buggy Diesire Splendour
Ink: Tim Holtz ranger
Doily: The Rubber Buggy Unique doily
Twine: Bella Creationz Timeless twine
Stickers: SRM
Other: misc heart pearls

Thanks for stopping by... glad to see you again.


Photobucket

Thursday, April 16, 2015

Scrapbook Stamp Society with Sherri Baldy and the many amazing images that suit Layouts too


OMG I am loving using digital images on my layouts. So many people just use them for cards..
BUT WHY? There are so many images that suit the pages we create too.
Hope to convince you to give it a try too.


My up close view of the cute copic coloured image...  and she is just too cute.
look at the sideways hat.. the little girl that is girlie and sporty all at the same time....
and below the actual image and links to the store to purchase it.

 Digital Digi Stamps Big Eye Big Head Dolls Bestie Img515 Prudence Gallorie My Besties By Sherri Baldy 


These 2 close ups give more views of the fabulous accents.


Great 3D stickers for the perfect title for my page.

Supply List:
Cardstock: misc
Accents: Paper House STDM -0204
Ink: Tim Holtz ranger
Cricut drawn accents: Cricut and ink pens
Circle Cutter: Kreaxions
Image: Scrapbook Stamp Society with Sherri Baldy

Sunday, December 28, 2014

JnW Crafts and Trees


Hi ... at JnW Crafts I am super excited to share some fun Christmas cards using
lots of trees.. in the paper, cut out of paper, one abaca fibre tree and also a wood one 
with some added ink to colour it.

This first card has a cute image, a punched doily and border and some fun trees.
Trees in the background paper..and the  glitter tree is stencil traced and cut out
using the amazing JnW Crafts Tree.

Supply List:
Papers: Robin's Nest 
 Accents: Robin's Nest dew drops
 Stencil: JnW Crafts Trees
Image: Scrapbook Stamp Society Sherri Baldy
Punch: Just Imagine Crafts/Kreaxions
Markers: Copics
Other: stickles

****************************************


This card boasts lots of trees all so different and trimmed with mixed 
colours of dew drops.
A film transparency, a border and some tied twine finish this one off.

Supply List:
Papers: Robin's Nest 
 Accents: Robin's Nest dew drops, JnW Crafts wood tree piece
Stencil: JnWCrafts Tree
Other: twine, Christmas film, Abaca fibre


Thanks for stopping by today.. enjoyed sharing all the fun trees with you
on these 2 cute cards.

Photobucket

Friday, December 12, 2014

Paper House celebrates this month with paper pads


Hi.. so how are you all today... At Paper House mixing fabulous paper, great photos and fun accents
makes for a fun, cute , adorable and loveable page.
Starting with a full background sheet from Paper House 12x12 Nature paper pad.. 
then mixing in some Little girl papers from another smaller size paper pad 
worked perfect together. The shades of blue and pinks pulled the colours from
the subtle softer background themed paper.
I also mixed my Kreaxions and digital images to this project.

Supply List;
Cardstock: misc.
Stickers: Paper House ST 2243E, STCX -0110
Digital Image: SSS Sherri Baldy
Markers: copics
Frame: Cricut cut SSS svg file, title
Pens: Staedtler black, Signo white gel
Circle Cutter: Kreaxions
Ink: Tim Holtz ranger
Accents: SRM
Dew Drops: Robin's Nest


In the close ups we get to view some details up close.
The title is cricut cut and used the negative and matted it to make the letters pop.
The fun sisters digital image from Sherri Baldi was a perfect touch to this sisters page
with fun photos. The matting also svg file cut with cricut.


So many times I have mentioned that if you have a busy background you sometimes need some 
accent papers behind the photo or groupings to ground them to the busy paper.
Using both the blue strip, pink which is Kreaxions # 309 punched border and a Kreaxions cut white circle gave the 3 small photos a base. It is gentle slid behind a small portion
 of the flowers in the background floral print.
The corner is done with SRM stitch stickers Or sewing machine if you have one.


All the base clustering is perfect for these grouped photos. To 
add some more floral accents I used the Paper house stickers, added
a butterfly and gave it a flight path using a black ink pen.
So mixing big paper pads and smaller ones  .. using complimentary hues 
works perfectly on this page.
Thanks for your visit... hope to see you again soon.

Photobucket