Saturday, September 26, 2020

Teepee card VIDEO and instructions with Bev Code

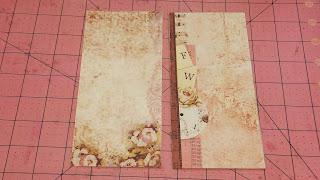
Hi... Bev here today at The Rubber Buggy.  I am sharing  a video making teepee cards


Here is a sample of teepee card and also the printable version so you can make one too.  


Thanks for stopping by... hope to see you again soon ... but in the mean time be sure to stop by the STORE where these items and so many others are available. Also take note of all the products that aren't carried in our regular local stores. ... AND the service is A1. 

    Monday, February 3, 2020

    Laserowe Love Yellow Spring Collection from The Rubber Buggy

    Hi... Bev...  here today at The Rubber Buggy.  I am sharing  2 fabulous fun bright and easy cards made using Laserowe Love Yellow Spring Collection. It comes with amazing prints, coordinating complimentary patterns and accents sheets.


    The Rubber Buggy Supplies:


    Thanks for stopping by... hope to see you again soon ... but in the mean time be sure to stop by the STORE where these items and so many others are available. Also take note of all the products that aren't carried in our regular local stores. ... AND the service is A1. 

      Monday, January 20, 2020

      Post It Notes with Pens - cute gifts for all Occasions

      Hi... Bev here today at The Rubber Buggy.  I am sharing  some really cute Post It Notes/ with Pen decorated using Mintay Journal Tag sheets and accents. They are cute, simple and quick to make.


      The Rubber Buggy Supplies:


      INSTRUCTIONS TO MAKE POST IT NOTE/ PEN GIFTS
      To make these follow these simple easy instructions.... and have fun... decorate for any special occasion or celebration when you want a small token or hostess gift.

      Using store bought post it or sticky notes.... measure and cut 2 sheets of paper to fit the front, end panel and back of the post it notes. (just slightly bigger to allow for the curve and corners of the cardboard)
      Then cut a front panel, back panel the size of post it notes... using medium to heavy cardboard.
      For the end size the small piece and cut a cardboard... but cut it slightly smaller .. you will be leaving a spacer between the sides of end panel.... see photo below.


      Above is a photo of the cardboards as they will be glued to both sides of the 2 papers. (If you cut a slight bit larger you can always cut the ends after gluing and getting the correct size.)

      When gluing the 2nd paper to cardboard be sure to add extra glue in the valley fold space between and using your scoring tool to push the papers firmly between the folds.

      The extra space allows for your base to fold easier.
      Attach the back of the post it notes onto full back of the cover.
      **** to attach the pens on a ribbon tie the end of ribbon to the pen  ***** leave extra length of ribbon for the pen to reach around and write to bottom of post it note. Glue the other end of pen ribbon onto the end panel of the base... glue full end panel and glue to end of base. Hold firmly until it sets. 
      Now tie another ribbon around the base and pen and tie a bow.


      These 2 are decorated for Valentines Day.... but like I mentioned.. you can decorate for any occasion.


        Thanks for stopping by... hope to see you again soon ... but in the mean time be sure to stop by the STORE where these items and so many others are available. Also take note of all the products that aren't carried in our regular local stores. ... AND the service is A1. 


        Monday, January 13, 2020

        Prima Marketing Inc Love Clippings A4 Collection Kit


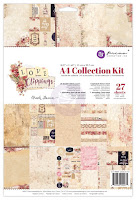
        Hi today I am sharing projects for The Rubber Buggy using Prima Marketing Inc Love Clippings A4 Collection Kit. What a fabulous mix of colours, prints and some soft n subtle while other amazing prints in bold colours. My first project is a small to medium box... I am making lots of these for Valentines Day.. and this collection is the perfect colour and print combo for these amazing treat boxes.

        So using my new Cricut Explore Air 2 I cut the base for my box.

        When your using to the machine you can then place the paper with pattern in the right spot to cut the prints to best suit your projects.

        This above and below photo is the finished cuts with print placement to make a fabulous box.


        I then fussy cut pieces from the collection to decorate the box. .. and 3D foam popped up also.

        On the front I layers some tags and tied them on with ribbon.

        From the side view you can see the dimension of the finished box. I use plastic bags inside filled with chocolate candies... or any thing you would like to give your Valentine.


        Supply List
        The Rubber Buggy Products


        Other: cardstock, ribbon, cricut Explore Air 2, 

        For my 2nd project I am using the same products  from the Prima Marketing Love Clippings A4 Collection Kit. So many amazing coordinating pieces for any project. What a cute card... and so easy to make using this kit.


        Thanks for stopping by... hope to see you again soon ... but in the mean time be sure to stop by the STORE where these items and so many others are available. Also take note of all the products that aren't carried in our regular local stores. ... AND the service is A1.