Saturday, October 28, 2017

Friends card with Dies R Us


Dies R Us has an amazing mix of dies plus many other products. I am starting by sharing lots of die cuts from their collection. On this specific card I went for lots of paper and accent colours but love the white die cut pieces with the black die cut sentiment.

Supply List:
Dies R Us: tutti word set Friends 234 -  Musical Stave 339, Daisy Panel 192
Paper & Chipboard: The Rubber Buggy BFS Wanderlust Collection
Twine: Whisker Graphics
Other: cardstock, brads, ink, bling


When starting a card I pull papers, cut dies and prep the accent pieces. 


I am going to share my twine tied bow. I hate single strand bows. I start with double piece of twine.


Then starting at the centre I tie a standard bow using double twine.


Do not make your loops too big. It's for a smaller accent on this card.  When you decide how big you want the bow and how wide you want the loops pull tight. When they are not perfect and still a bit too big.... with a finger on the centre part of the knot pressing down firmly.... grab one end and pull until the loop is the size you want. Repeat on other side.


Now that they are smaller and closer to the same size I pull loops evenly to tighten one more time so they don't move.


I now cut of the excess ends and it's ready to glue to my card.


Here are some close ups for better viewing and details. I used foam pop ups to add height and depth to the centre chipboard and added the bow on top.


Here is the the die cuts... they are perfect for this card.


Bottom corner I added 3 black brads to coordinate with the sentiment colour.


Any friend would love this card to say hello.


Don't forget to come join in the fun at the Dies R Us Challenge Blog.  There's a new challenge theme offered on the 1st and 15th of each month and one lucky randomly drawn winner will receive a gift voucher prize to the Dies R Us Store.  For your convenience, all the important Dies R Us links are provided below.
click below for:
FRIENDS OF DIES R US PINTEREST PAGE

Thanks for stopping my. So glad to see you.

Thursday, October 26, 2017

Creative Escape Papercrafting using Fall Frenzy Kit


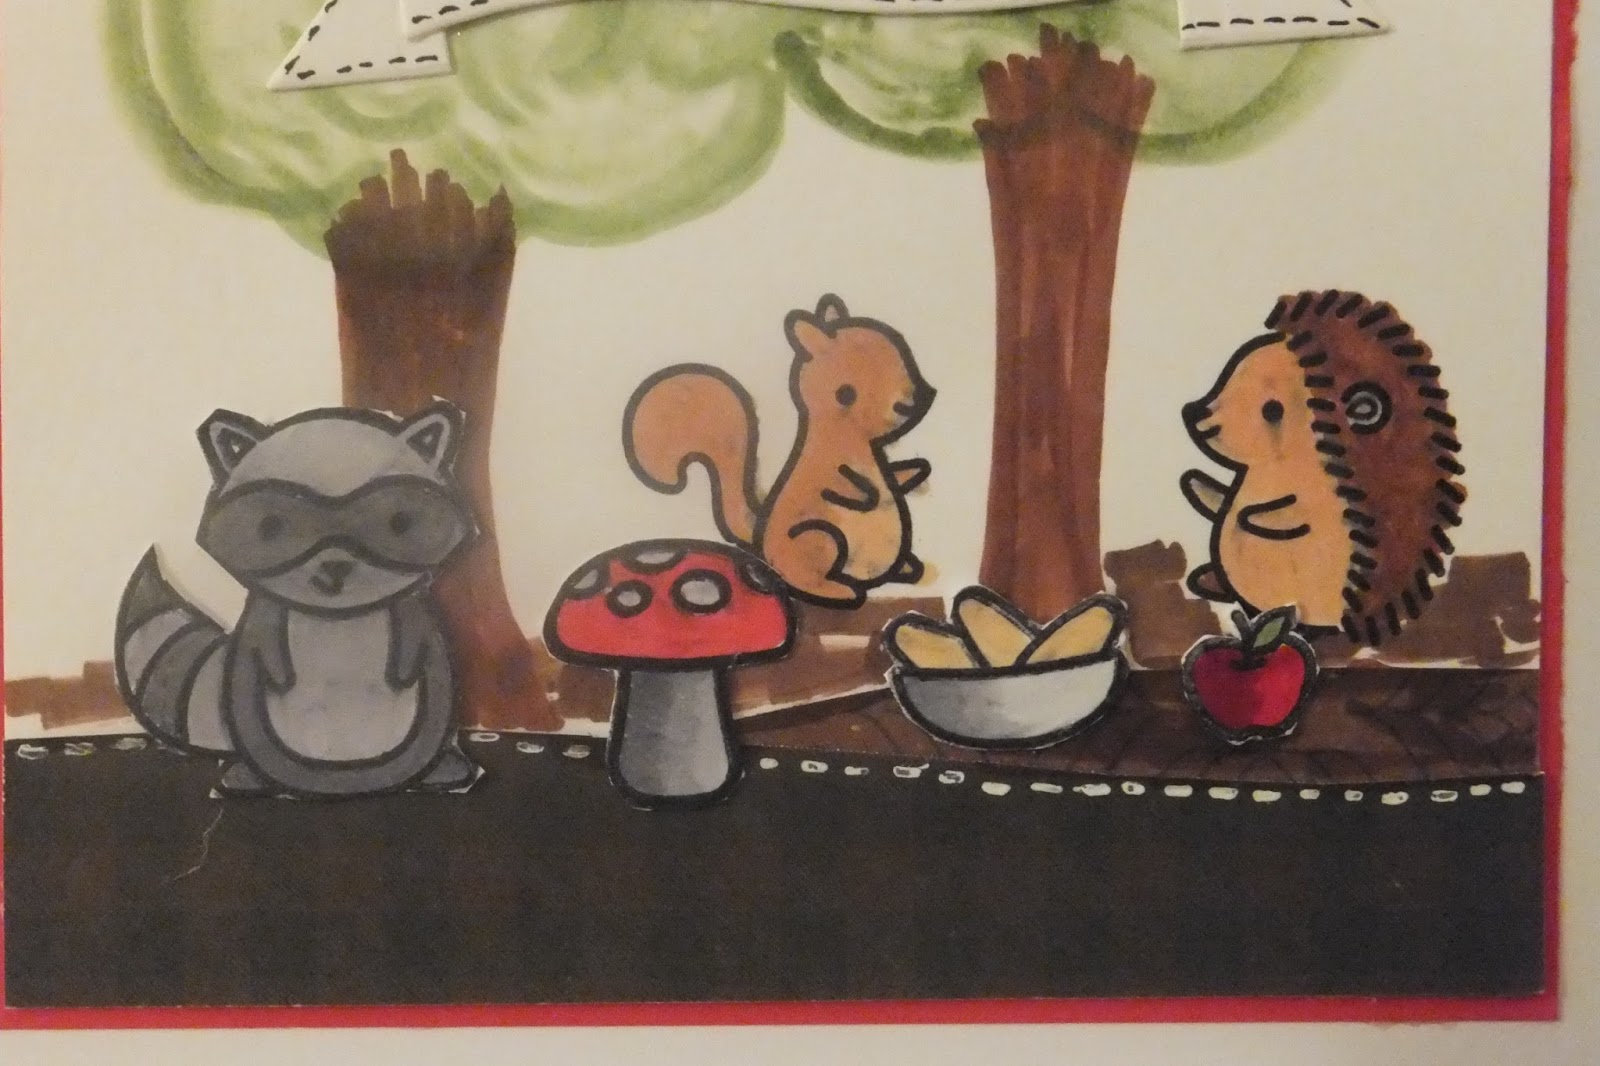
Hi.. this is my 8th card for Creative Escape Papercrafting using the Fall Frenzy Kit. OK if I am really honest with you... at this point my paper pieces from this kit are really running low. It was enough however to make the bottom base for the landscape. From there it's all stamping and copic colouring but I still think it turned our really cute. You just have to use your imagination and have fun.


Description

This kit is packed with hand-picked goodies to enable you to have a fall card making frenzy.  It’s perfect for Thanksgiving cards but also has elements that you can use all year.
The kit contains:
1 “Forest Feast” Lawn Fawn stamp set featuring 14 images and 11 words/phrases (made in the USA)
1 “So Thankful for You” Lawn Fawn die, approx. 5.75″ long (made in the USA)
1 Echo Park “A Perfect Autumn” 12×12 Double Sided Paper 3″x4″ Journaling Cards (cut into 2 pieces for shipment) (made in the USA)
1 Echo Park “A Perfect Autumn” Seasonal Stripe, approx. 12″x1.75″ (made in the USA)
12 double-sided 6″x6″ sheets of Echo Park “A Perfect Autumn” paper (made in the USA)
1 sheet of 8.5″x11″ yellow card stock
2 sheets of 8.5″x11″ kraft card stock
3 sheets of 8.5″x11″ white card stock
1 sheet of 8.5″x5.5″ copper card stock
1 sheet of 8.5″x5.5″ water color paper
1 sheet of 8.5″x5.5″ alcohol marker paper
1 Fall Frenzy sequins mix (1.5 teaspoons of sequins)
3 assorted die cut pumpkins (various sizes)
10 assorted die cut leaves (various colors and shapes)
3ft of yellow and white cord
3ft of  jute twine
3ft of natural hemp cord
1 bottle of Golden Sunset Nuvo Glitter Drops (1 fl oz)

So to start this card I pulled the great stamping paper from the kit, the ink, my misti stamping tool,.. the dies I had to make the pennant sentiment and the small pieces of brown paper that was left for the landscape pieces. The pieces stamped above will be coloured and hand cut out to place them on the page into the scene I will be creating.


In the above photo I have roughly decided where the landscape pieces will fit on the bottom and est this I then stamped the 2 critters onto the card base to fit into the background.


Now after colouring all the pieces with copic markers.... I put the pieces into place. The background still looked pretty empty and bland so I had drew the trees and then placed the pennant sentiment on top of the trees adding another layers. Now it looks complete and I am happy with it. To the tip today is to have a few elements stamped into the background, then add some paper, and more cut or die cut images out in front to give depth and dimension to your project. I doodled a line across the landscape to show the layers too.


Up close you can see the added touches and the details... all little things that make your project just right. Thanks for stopping by.... see you again soon.

Wednesday, October 25, 2017

Creative Escape Papercrafting using Fall Frenzy Kit


Hi.. this is my 7th card for Creative Escape Papercrafting using the Fall Frenzy Kit. Now that I am down to scraps from the kit.... all you need to do is use the pieces and make any pattern background you can shaping and cutting to fit the card base. Be sure to give this a try sometime... really uses up all those pieces you otherwise would throw out.... but don't have to now.


Description

This kit is packed with hand-picked goodies to enable you to have a fall card making frenzy.  It’s perfect for Thanksgiving cards but also has elements that you can use all year.
The kit contains:
1 “Forest Feast” Lawn Fawn stamp set featuring 14 images and 11 words/phrases (made in the USA)
1 “So Thankful for You” Lawn Fawn die, approx. 5.75″ long (made in the USA)
1 Echo Park “A Perfect Autumn” 12×12 Double Sided Paper 3″x4″ Journaling Cards (cut into 2 pieces for shipment) (made in the USA)
1 Echo Park “A Perfect Autumn” Seasonal Stripe, approx. 12″x1.75″ (made in the USA)
12 double-sided 6″x6″ sheets of Echo Park “A Perfect Autumn” paper (made in the USA)
1 sheet of 8.5″x11″ yellow card stock
2 sheets of 8.5″x11″ kraft card stock
3 sheets of 8.5″x11″ white card stock
1 sheet of 8.5″x5.5″ copper card stock
1 sheet of 8.5″x5.5″ water color paper
1 sheet of 8.5″x5.5″ alcohol marker paper
1 Fall Frenzy sequins mix (1.5 teaspoons of sequins)
3 assorted die cut pumpkins (various sizes)
10 assorted die cut leaves (various colors and shapes)
3ft of yellow and white cord
3ft of  jute twine
3ft of natural hemp cord
1 bottle of Golden Sunset Nuvo Glitter Drops (1 fl oz)

So using craps cut long thin pieces to form a side border. Stamp a cute cluster for your main image and sentiment and mat it.  Use a strip of the fun owls  and grab a scrap of fun bright coloured print and mat it too. Stack them and they look great.


Finish with a fun wrapped twine and tied bow around the border piece. Add some background layers for colour and depth... and add some brads or accents from your stash. It looks really cute... and was so easy to make.

Paper House Halloween project


This fun Halloween layout shows my 2 youngest grand kids when they came to visit us for trick or treat. I has great photos showing them dressed up and also all the great decorations I had on our large porch. All the kids loved to visit us when we were home to celebrate Halloween with them. It was a fun night with all our little guests that came to visit.

Supply List:
Paper Paper House Wicked Good 
Acetate: Paper House cobwebbed
Stickers: 3D STDM -0291, Sticky Pix cardstock STCX -2009
Life Organized: STRB - 0003, STCP - 1002
Washi Tape: STWA - 0003
Other: Tim Holtz distress ink, cardstock


This amazing fun Halloween page came together using so many great  Paper House accents of all kinds. The base is Wicked Good collection and the cobweb acetate was awesome to cover it. I cut lots of great accents from the sheets, grabbed every Halloween sticker accent that I had along with some great photos.


Acetate over paper was perfect.... it showed up even better than I thought.


I started with a fun upper border with accents.


Washi tape across the bottom... a photo and lots of sun accent stickers.


The upper corner with a web and some accents... along with the circular photo with even more fun stickers.


Another great photo with a white mat... great stickers  surround it.


Close ups for better viewing of all the great accents.


So many fun and cool black cats, great skeletons and I added lots of flying bats.


Thanks for stopping by today... see you again soon.


Tuesday, October 24, 2017

Creative Escape Papercrafting using Fall Frenzy


Hi.. this is my 6th card for Creative Escape Papercrafting using the Fall Frenzy Kit. This card is just a fun fall creation using great colours, some die cut elements, twine tied bow and a fun journal card cut from the paper collection.


Description

This kit is packed with hand-picked goodies to enable you to have a fall card making frenzy.  It’s perfect for Thanksgiving cards but also has elements that you can use all year.
The kit contains:
1 “Forest Feast” Lawn Fawn stamp set featuring 14 images and 11 words/phrases (made in the USA)
1 “So Thankful for You” Lawn Fawn die, approx. 5.75″ long (made in the USA)
1 Echo Park “A Perfect Autumn” 12×12 Double Sided Paper 3″x4″ Journaling Cards (cut into 2 pieces for shipment) (made in the USA)
1 Echo Park “A Perfect Autumn” Seasonal Stripe, approx. 12″x1.75″ (made in the USA)
12 double-sided 6″x6″ sheets of Echo Park “A Perfect Autumn” paper (made in the USA)
1 sheet of 8.5″x11″ yellow card stock
2 sheets of 8.5″x11″ kraft card stock
3 sheets of 8.5″x11″ white card stock
1 sheet of 8.5″x5.5″ copper card stock
1 sheet of 8.5″x5.5″ water color paper
1 sheet of 8.5″x5.5″ alcohol marker paper
1 Fall Frenzy sequins mix (1.5 teaspoons of sequins)
3 assorted die cut pumpkins (various sizes)
10 assorted die cut leaves (various colors and shapes)
3ft of yellow and white cord
3ft of  jute twine
3ft of natural hemp cord
1 bottle of Golden Sunset Nuvo Glitter Drops (1 fl oz)

By the time I was creating this card my paper stash from the kit was getting low. To make this work I took what you see above and liked the stripe idea. I was even going to have to use the end cut off pieces to finish the 2 corners. I also decided that more striped strips would be fun. 


So cutting the strips into smaller width I started putting them together. This techniques is cool at anytime when you get down to small pieces from your stash. Then I assembled the centre tag, tied the twine bow and clustered the cute pumpkin die cut with a few leaves. I used a black pen to doodle on the clustered pieces to give depth and dimension.
Thanks for joining me today... and will see you again soon.