

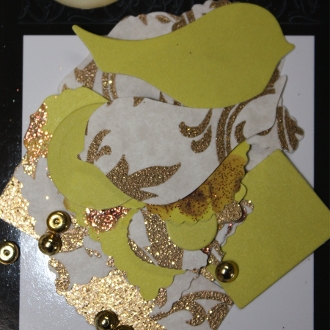
I am super excited to be returning another DT term with the Robin's Nest. They never stop production of great new and fabulous products for me to share with you. Today I am creating with one of my favourite collections Saffron Sunrise. I am sharing how to make a shaker card using dew drops as the shakers.
Supply List:
Robin's Nest Products:
Paper: Saffron Sunrise Collection
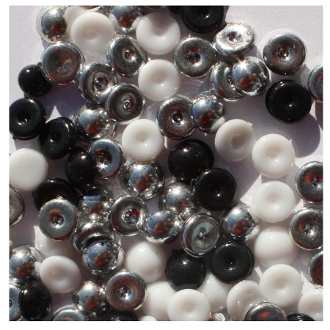
Dew Drops: Originals
Ribbon: Grey
Shaped die cuts: Saffron Sunrise Mini Die Cut Shapes
Other: Kreaxions punch, sentiment, cardstock
Instructions:

STEP #1: Starting with a cardstock card base pull the papers you plan to use. Also find a clear plastic piece (i use clear plastic from my crafty purchases ) to make my shakers. My piece is a circle so I decided to mix up some shapes on my project. The square background base is slightly smaller than my card base. The circle is slightly bigger than the plastic so I could punch a border edge around it.

STEP #2: Everything in the paper so far was very light .... so I chose a dark grey accent cardstock to make thing pop. I made a matt for behind the border punched accent piece so the flower showed up grey and popped.... but the centre was far too dark for the dew drop shaker section.
We are assembling all these layers without gluing anything until it is set with no additions.
STEP 3: I then cut the centre of circle out to fit the outer edge of the circular plastic piece.
STEP #4: To lighten the centre section of the shaker I picked a section of pattern paper that had a logo on it.. something to add more to the design in centre section. I cut it slightly bigger than the plastic circular section.

STEP #5: Next I started gluing the plastic piece to the punched circular ring. Never use too much glue around the plastic section that the shakers would be touching? OR make sure glue process is firm and dry before starting the next process.


The side view allows you to see the height of the plastic for shaking space of dew drops.

STEP #6: Pick the shakers you intend to use... they can be dew drops, beads etc. Pick colours to compliment your shaker paper... matching or total opposites is great too.... they are all fun. Place them in the centre as to keep the next gluing process away from them.

STEP #7: Add glue to the underside of the shaker top that you have put together being sure to keep the glue to the outer edges only..... but enough glue to hold firmly and keep the shakers inside.
Place it in the centre so the matted edge in dark grey is equal all around.

STEP #8: After putting the main piece together and placing it on top of the print background.... it still needed something. Pulling a grey print and matting it made for another perfect layer of colour to give depth and dimension to the card.
STEP #9: Now it is time to accent any way you like to fit any occasion you like. I found some ribbon to add to the matted tag, added more dew drop accents around the outer punched border and using a butterfly shape from the die cut shape collection I had a finished card.


Thanks for stopping by today.. and be sure to visit often when I have so many great things to share with you.

2 comments:
So pretty Bev! And congrats on making the team again! BL
Fabulous shaker card! Congrats on making the team again! BL
Post a Comment