Saturday, March 2, 2019

One Crazy Stamper uses High Hope Stamps on Layouts

Welcome OCS Fans;

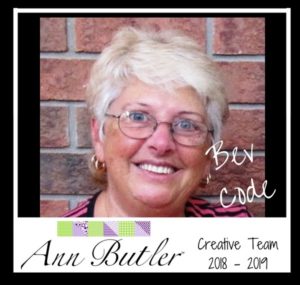
Hi it's Bev here today and I am super excited as this is my first DT project for One Crazy Stampers using High Hopes Stamps. I also am thrilled to tell you that I will not be doing cards but scrapbook layout pages and some of the accents will be co-ordinating stamps for the themes of the projects. It should be great fun.

This page is showcasing Peeking Kitty with Heart, Friends Fur Ever on a layout of my eldest Grand Daughter and her Cat Miles. The photos are from this past xmas but OMG look at the 2 of them together.


To start my project I stamped the image and copic coloured him as close as I could get to his real colouring. I then always highlight using signo white gel pen.


In the close ups you get a better view of some details on the page.


Supplies used:
  • Stamps:  Peeking Kitty with Heart P128, Friends Fur Ever F129
  • Copic Markers: R20, R21, R22, R24, R27, R29, E00, E01, E31, E33, E35, W5, W7, G12, G21, G24     
  • Paper: xmas Collection, 
  • Chipboards: Creative Embellishments
  • Other: signo white gel pen, cardstock, Creative Embellishment flair button, Ann Buttler's Iridescents
Be sure to stop by the One Crazy Stamper blog and Facebook Page for some daily inspiration from the Design Team Divas.  You can also follow us on Instagram, Twitter and Pinterest.
Thanks for stopping by and have a fantastic day.
Hugs, 


Iridescent Chipboards from Creative Embellishments


So I am multi tasking today with a great page from our visit to McKee Gardens in Florida. I used lots of Creative Embellishments products on this page along with the Sketches in Thyme February 1st challenge sketch below. With the colour from the garden photos i chose to use Ann Butler's Iridescent medium to cover the chippies. In the background over the print papers I used Creative Embellishment stamp in black.

Creative Embellishments Products
Stamp: Squares
Other: print paper, cardstock, flowers, Ann Butler Iridescent medium, stickers
Sketch: SIT 


In this photo you can see proposed chippie placement and the stamping on the background.


The chippies are covered with limelight iridescents which gives them a slight sheen.


The smaller size photos looked lost on the central section so I quickly added iridescents to the different sized squares to fit the photos... so they were framed too. 


With the core and main page done I did some flowes along with some stickers to form clustered sections.


Another clustered section.


The main section through the centre is awesome and the photos are still the main attraction.


Be sure to visit the STORE for these and so many other products..... chipboards, stamps, stencils and flair buttons too.... and the greatest service. 
So happy to have you visit.... see you again soon.

Thursday, February 28, 2019

Fun Techniques using Ann Butler Products

Fun Techniques using Ann Butler Products


I created amazing backgrounds using Ann Butler products. Wtih so many colour options creating is fun. 


I created this background for my card. I used the soft elegant colours to compliment the papers.


Step 1:

These photos show the technique used to create the finished look.
I stamped the coloured i planned to use on a scrap... and added some water to thin it and to where I could grab the colours from the paper with a paint brush.


Step 2:
This photo shows how i spread the colours over the main card base in about 3rds and blending together at the edges of colour change.


Step 3:

After applying an accent border piece of paper I took the paint brush with lots of ink on it and flicked it onto the background using a mix of colours.


Step 3:

With the main background done I 3Dfoam popped the print paper section with the bird ready to apply to center of the background.


Step 4:

With everything glued together I have an amazing card for any birthday and the background colours look amazing with the print images.


******************************************

I created this background using Ann Butler Iridescents... which look metallic or pearlescent.... and coloured chipboard with it too. What a rich elegant finish.


Step 1:

I put the medium on the baggie on my hand and then applied some water... I then scrunched it in my hand to spread it around on the baggie. It was then dabbed onto the tester paper.

Step 2:

After seeing the tester I then took the big jump and I appied the same technique to this scrapbook page layered background. It looks awesome. With all the fun bright colours of paper the pearlized iridescents medium in Orchid was perfect.


Step3:

While testing the iridescent medium on paper I decided to test it also on chipboard.... and OMG I love it... what a fabulous shimmer to add to make great accents for your projects.


Step 4:

Here is my project using lots of Iridescent medium on my scrapbook page.


Ann Butler Designs Products used:

Ann Butler’s Crafter’s Ink by Clearsnap:  Ocean Breeze, Berry, Evergreen
Ann Butler’s Iridescents:  Orchid

Other Products
  • card base
  • print papers/accents
  • cardstock
  • 3D foam
  • Beacon 3-in-1 glue
  • paper trimmer
  • chipboard
  • flowers


Tuesday, February 26, 2019

Stick it Down So Sweet Layout


I have been playing along with Stick it Down today.  I am sharing a project using their sketch  and the paper is Authentique Sweetheart Collection. I used lots of Creative Embellishments products like the stamping, the flair button and lots of copic coloured chipboards. I then added some flowers and pen doodles some fake stitching.
This fun page is actually photos of when I was a baby. ... when photos were still black n white.


Thanks for joining me today.... hope to see you again soon.

Photobucket

Field Hockey Sports Page


Using Scrap our Stash sketch below and only using half of it... along with stripe paper and mixed alpha I created this fab sports page of my youngest Grand Daughter playing Field Hockey at ESPN in Orlanado Disney. It was an amazing 4 days spent with her as the team won 3 games and lost 3 games. I am using lots of Creative Embellishments Chipboards which are accented using Ann Butler Iridescnent medium. Papers are from The Rubber Buggy and it's 7 Dot Studios Yuletide Collection.


Photobucket

Mosaic Style Cards Dies R Us


Hi .. How are you today. This DT project for Dies R Us showcases Birthday cards made using some die cuts along with Scraperfect Best Glue Ever with the non clog writing tip. For these projects I am using the die looks like mosaics and you can use them plain or add the coloured inset pieces.. your option.
Supply List:
Ink: Tim Holtz Vintage Photo
Machine/ tools:
Other: Cardstock


After cutting the mosaic frame cut again putting some coloured paper into the section you want tosave the pieces from.


Theses 2 are done like stain glass with some amazing coloured pieces inset into the frame.


These 2 are more muted using just print paper to cut the image and mount on the background.


All the stamping is done using a stamping platform.


Don't forget to come join in the fun at the Dies R Us Challenge Blog.  There's a new challenge theme offered on the 1st and 15th of each month and one lucky randomly drawn winner will receive a gift voucher prize to the Dies R Us Store.  For your convenience, all the important Dies R Us links are provided below.
click below for:

Thanks for visiting... hope to see you again soon, Have a great day.