Thursday, June 22, 2017

Sneak Peak ... and don't miss the reveal tomorrow for the Robin's Nest

So  today at the Robin's Nest I am using a fabulous fun friends accent along with some amazing papers that work perfectly together. This super fun accent makes an adorable project. 


Thanks for joining me today... and hope to see you stop by tomorrow for the full reveal.


Wednesday, June 21, 2017

Blue Fern Studios June GDT 'Memories Captured' project using Happy Accident


Hi... Bev here today. As Fan of the Month at Blue Fern Studios I am thrilled to be able to create using layers of paper from the HAPPY ACCIDENT collection. I then stamped using WASHI STRIPS and  BLOOM & STEM stamps and added many chipboards. I finished it off with a cluster of SPRING FLORAL flowers. I am thrilled to be able to share with you the amazing products I used  on my project. 

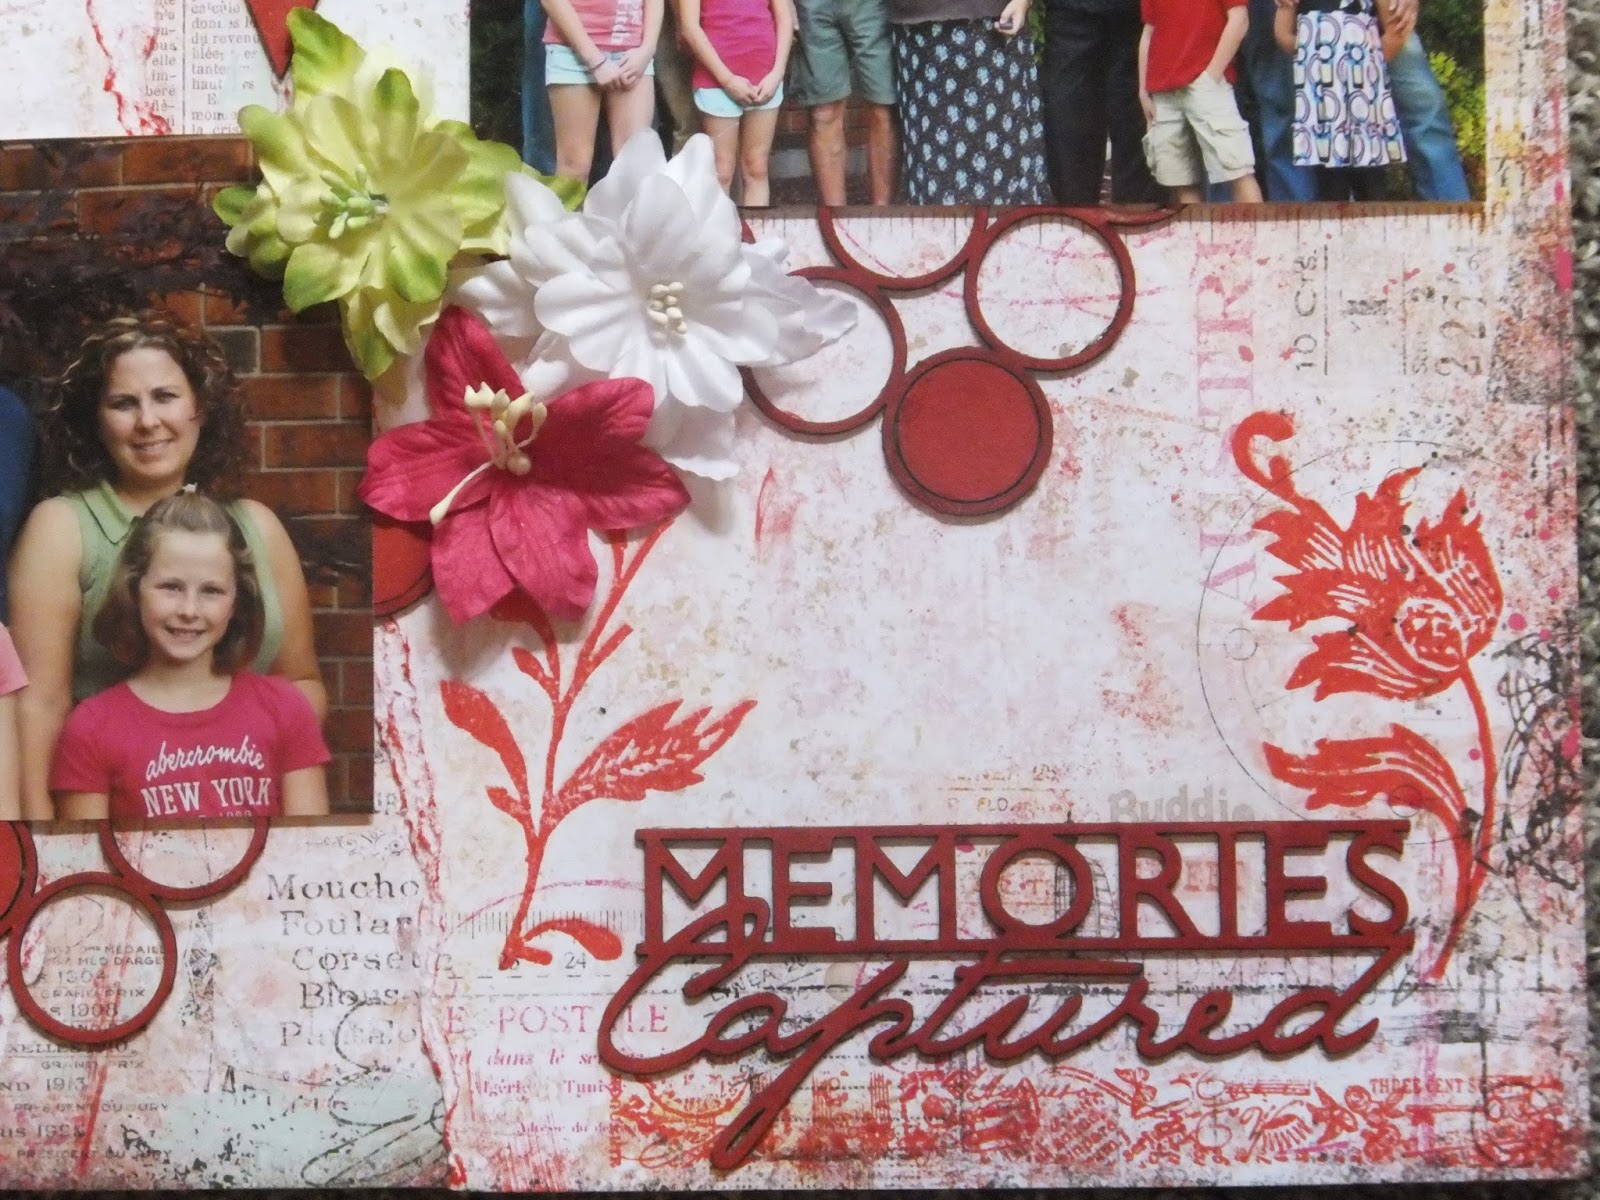
This Memories Captured page are photos of my eldest son's family along with a group family photo with everyone in it too. 


 For this page I used a background paper which I ripped and then slotted in another contrasting paper. I inked the edges for depth, texture and contrast.  From there I laid out my proposed chippies and photos to give me an idea where I could apply inked stamping of the bloom & stem flowers. 


The circular chippies were cut apart to fit and inked to match and coordinate with the main paper colours. I also inked the title chippies and some of the full circles to fill in some spot and to float a few freely on the page too.


In this section you can view the stamping, inked chippies and a fabulous cluster of flowers.


Close up view shows the amazing 3D flowers in stunning colours. 

 Blue Fern Studios products used:


Papers

Chipboards

Stamps

Flowers


Thanks for visiting today.... Hope to see you again next Wednesday when I get to share again using amazing products. 

Bev Code June Fan of the Month

Monday, June 19, 2017

Blue Fern Studios " Capture the Moment" using Memories Collection at The Rubber Buggy today


Today at The Rubber Buggy I am sharing a Wedding page with my eldest son using a group photo. I went with a soft elegant colour combo and accents. I used gold liquid pearls to cover the chipboards to make them shimmer.

Supply List:
The Rubber Buggy Products:
Paper: Blue Fern Studios Memories: Songbird's Drama, Autumn Biography
Chipboard: Blue Fern Studios Captured Words, Trailing Scrolls, Film Strips
Flowers: Blue Fern Studios Attic Charm
Markers: Copics
Ink: Tim Holtz Vintage Photo, Gold Liquid Pearls
Other: beads, metal, accent, PH accents

Challenge: Another Freaking Scrappy Challenge


To start this page I chose to change up the background with a bolder outer border and soft elegant central section and still keep the flower image.


I copic coloured the chippie then applied gold liquid pearls.


The photo was matted and on the side there are some Paper House 3D stickers in silver.


In this close up you get to see the pearl trim to separate the border edges, fussy cut floral and a film strip filled with print papers.


This section highlights a small floral cluster and a bead border.


The other floral cluster has more accents added like a metal butterfly and a liquid pearl trimmed chipboard.


The photo still remains front and centre with lots of great accents to compliment it. 


Thank for joining me today... see you again soon,


Thursday, June 15, 2017

"Jake" free wheeling on Creative Embellishments blog today


 Hi.... welcome to my blog today where I am sharing a Creative Embellishment page using the amazing washi tape cluster chipboard accents and  the greatest mix of Alpha letters for doing titles.
This is my only Grand Son Jake free wheeling on his bike at a very young age.....much like his dad did too. They are like two peas out of the same pod....LOL.
This page is fun, bright and colourful with great accents.

Supply List:
Creative Embellishment Products
Chipboards: Washi tape Clusters, Chunky Alphabet Set
Other: Simple Stories I {heart} Summer Collection, cardstock


For this page that was super bright and fun I ink coloured the chipboards 3 different colours to match the papers.


I ink covered the name super fun and bright too.. I cut the pinwheel out from a piece of the patterened paper for an accent.


Matched up another washi tape corner accent.... and to side of it is lots of stickers from this collection.


I added a matted round photo and the other photo to the centre of  a accent paper and mounted to the background paper.


I added lots more stickers. sticker alpha and more sticker journaling words. All this came together perfectly.


Thanks for joining me today.... and hope to see you again soon.


Wednesday, June 14, 2017

Blue Fern Studios Project as Fan of the Month of June


Hi... Bev here today. As Fan of the Month at Blue Fern Studios I am thrilled to be able to create using amazing products like  paper collections, stamps, chipboards and some of the newest ink glitters. I get to share with you how I used them on my projects. This Friends page is my Grand Daughter and her little childhood friend. 

Supply List:
Blue Fern Studios Products
Glitter: Imagine Ink Glitter Pink Diamond, Pea Soup
Other: ink, copics 


When creating  this page I started with layered shapes using different colours from this collection, 


I then used BFS stamps inked on to the open spaces. I then am using the newest glitter which I applied onto the glued spots around the stamped image. 


Tap off the excess glitter onto a piece of paper to collect it. You will want to save this for another project.


Fold over the paper and slide the excess glitter back into the bottle for future projects.


Here is the  multi tone stamped image with the glitter applied around it. Notice the corner chipboard also.


On this chipboard I ink and copic coloured the chippie.frame first. 


I then added the white glue to the flower where I wanted to add some glitter to it also.


Using the same process as above... scatter the glitter over the glued section. Turn sideways over the piece of paper to tap off on to. Save the excess glitter and put back into the container.


Here is the finished chipboard piece all coloured and glittered.


In this section I also added some amazing flowers from the Blue Fern Studios collections. 


In this section I added more inked chipboard arrow words coloured with ink or copics. I stamped a border  in lower corner and also added a chipboard accent.


Thanks for stopping by for my first product reveal this month. Hope to see you again next Wednesday when I get to share another piece with you.