Monday, August 15, 2016

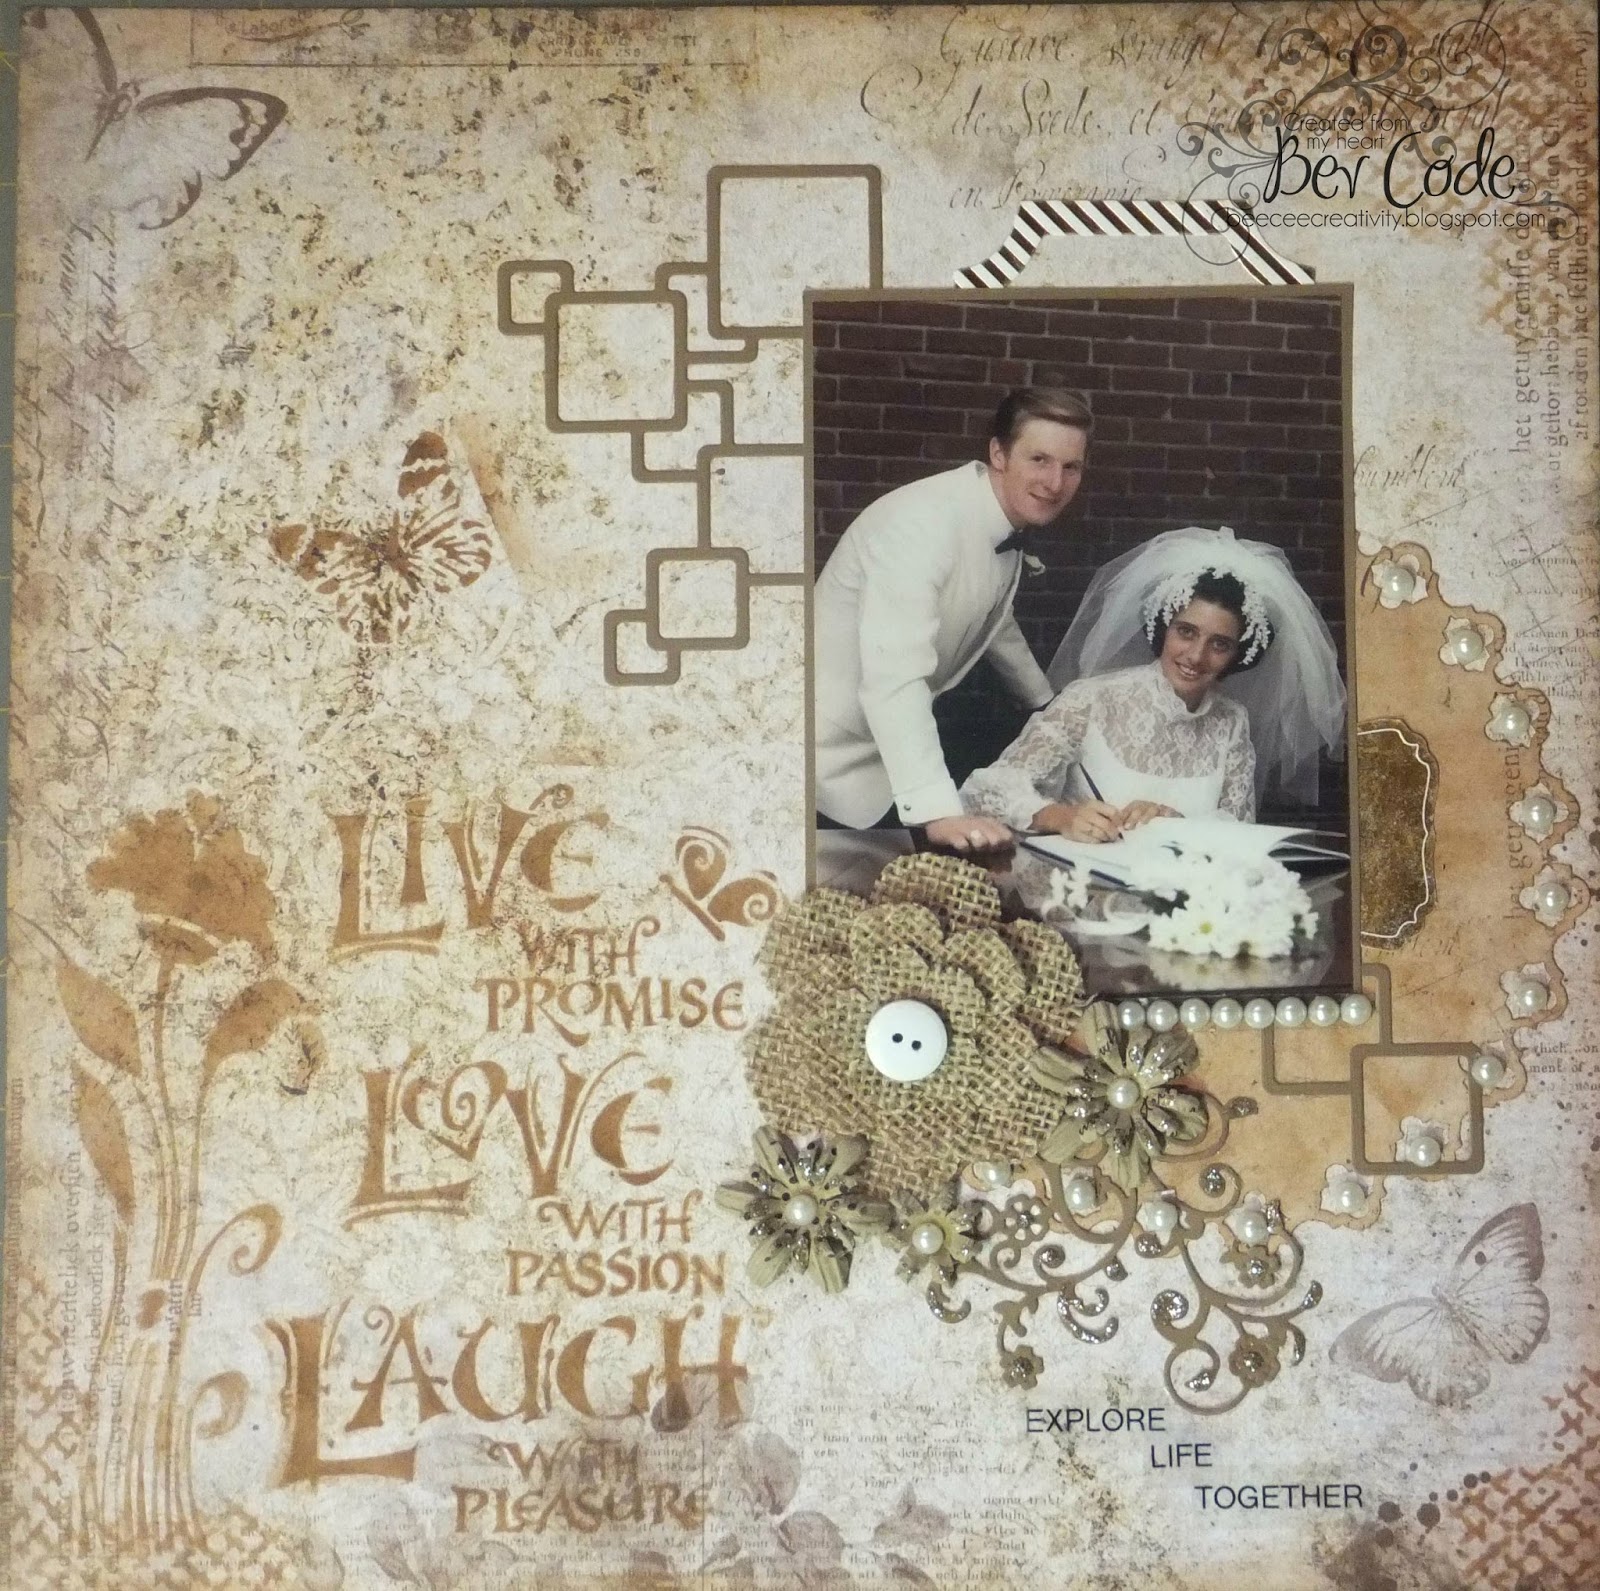
Live Love Laugh using Blue Fern Studio Tranquility from The Rubber Buggy


Hi Bev here today. I have been creating using both my black and white and colour wedding photos.
The Rubber Buggy products have been perfect for them.... slightly vintage while elegant and soft. This collection is Tranquility from Blue Fern Studios. The 123 Challenge this month also worked well with this layout.  

Supply List:
The Rubber Buggy Products
Paper: Blue Fern Studio Tranquility Peaceful
Stencils: TCW 467s Live Love Laugh, 554s Butterfly Collage
Ink: Tim Holtz ranger
Die Cut: Memory Box Square Links Die
Accents: Stickles
Other: punch mini 8, sticker alpha, flowers, beads, cardstock, recollection die cut


Colour: Chocolate

Word: Explore


Technique: Squares


Here are some of the details about my page. I started by laying out the papers. cutting the border circle. matting the photo, die cutting the squares and leaves and stenciling the live love laugh.  I then inked the whole outer edge.


In this section you can see the added stenciled corner and some misc. gold accents.


This section showcases a fun cluster of burlap flower, misc flowers with bead centre and the die cut flourish accent and the small alpha words including the challenge word "explore".


Stenciling adds such a great look to any projects... adds depth and colour.


I added stickles to pop the flowers and add that touch of bling. Also added some bead accents.


The finished central section showcasing my wedding photo is perfect. .. slightly rustic vintage with a touch of elegance and charm.


Thanks for visiting.. .. hope to see you again soon.

Photobucket

Feeling Sketchy and a Birthday Card


Today at Feeling Sketchy using the sketch below I created this fun card.. with lots of stenciling with ink, paint and pen. It is always fun to create a last minute card that that is fast and easy but the person loves it because it was handmade special for them


Be sure to visit the blog to view all the projects shared by the rest of the DT for you.

Photobucket

Sunday, August 14, 2016

Turtle Soup Monday Sketch


For August Monday Sketch DT reveal I shared the creation above using my sketch below.. It really is fun playing along with my own sketches.... and I love viewing the creations shared by others.
If you'd like to play along here is the link: Turtle Soup forum Monday Sketch.
For this one I dug into my stash for some fun colours and accents to play with

Supply List
Paper: Bo Bunny 


Thanks for stopping by...and remember the Turtle Soup has lots of challenges all month long and random ballots for every challenge you play along with. Stop by and say hello so we know you joined us.


Photobucket

Friday, August 12, 2016

"Dreamer" Layout C85 Shabby Rose Collection from Fabs Scraps


Today I share this Fab Scraps DT project done using C85 Shabby Rose Collection. This page is memory of my Grand Daughter getting her braces off after many months wearing them. What a beautiful smile. 

FOR THIS LAYOUT YOU WILL NEED:

Supply List:
Paper: C85 Shabby Rose Collection
Stencil: DS 05 50 shabby rose clock stencil
Chipboard: DC 85 002 chipboard Dreamer
Accents: metal, dew drop
Ink: Tim Holtz mini pad
Other: Spellbinder die cut, beads cardstock, sew easy ink roller, Kreaxions Circle Cutter, Heartfelt Creations flower shaper kit, copic marker


INSTRUCTIONS:

STEP #1: Pull your paper choices....  cut some shapes/ layers and you plan to use them. I chose some circles... one solid and one ring with the full sheet background for starters.


STEP #2: I decided that I'd layer the circles per above.


STEP #3: Next I thought it would be great to add more colour, depth and texturing to the page by stenciling the circles.


STEP #4: I added even more stenciling and also added ink to the edges of the circles to pop each layer.


Here is the close up of this section.


STEP #5: I chose this photo which needed matting top showcase the photo and I pulled the chipboard Dreamer title.


STEP #6: I copic coloured the chipboard and to make the  title pop I added paper backing.


STEP #7: I die cut flower pieces using Heartfelt Creations dies... but you can punch them also. I then shaped them using the Heartfelt Creations shaping kit.


STEP #8: Next you pick some accents... above is some chose to pick from. 


STEP #9: I went with the layered flowers with a dew drop centre and twine tied the metal accent to the flower cluster. I added some pearl border to the layout.


STEP #10: Here is the finished section with the double matted photo, stenciling and the clustered section.


STEP #11: I also added a 2nd cluster of flowers with a die cut flourish accent. Also I cut the grey print to create a paper border  and darkened the mat to make it pop.


STEP #12: In this view you can see how the layers, colour changes and stenciling gives added depth to the piece.

Thanks for joining me today.


Amazing Robin's Nest page using Classic Glitter products


"Amazing" is a page for sparkle and shine to go with the costumes. Robin's Nest lines with sparkle and shine are perfect for this group photo. It comes in many shades and colours but the richness of the gold and brown and black and gold with even more plain black were the best layers.  I used some gesso stenciling to blend between the layers.

Supply List:
Robin's Nest Products:
Stickers: Glitter Alpha
Other: gesso, stencil, accents, flowers 
  

Instructions: 
1. To start this page I lay things out (some cut into smaller pieces) and start the layers I think I'd like to see. I might even have a few accents in mind to start.. but can change them up after.


2. In this photo I decided on the layers and added some gesso stenciled in white for texture and depth. I placed it above and below the photo between the layers. 


In the photo above you can see the gesso stenciling. 


In this view you can see the gesso stenciling below.


3. In this section I share the accents done on either side of the photo and also a small cluster of flowers and accents to lower left.


4. I added gold alpha letters and also a gold striped accent under the background paper.


Close up view of the cluster.


5. This showcases a few more accents in the upper right of the photo.

Use as many or as little amount of accents. Design to you tastes.

*******************************************************************

UP NEXT: While creating dance pages I also did this quick and easy Fold style page to hold the certificate.  

Supply List:
Robin's Nest Products:
Accents: Alpha letters, die cuts, Journal tags
Other: lace, cardstock

Instructions:
1. Starting with a full 12x12 cardstock base for your background..... cut your front papers in half to glue the full top piece down and on the bottom only glue the outer edges and very thin line across the bottom. Extra support can be added by stapling along the 3 sides for reinforcement.


2. Now accent the page any way you like. I added lots of Robin's Nest accents... the star, fireworks and journal tag.


3. If you have any photos, lace or metals .. go ahead and add them.  I also added a lace border where the 2 paper meet in the middle.. but be sure to leave the slot open to add the documents etc.

Thanks for visiting today..... see you again soon,

Photobucket